
V.D. PyMOL Mouse/Trackpad Selection
Roderico Acevedo and Kristen Procko
Overview: This activity demonstrates how to select and label parts of a macromolecular structure.
Outcome: The user will be able to identify parts of a macromolecule of interest, select them with the mouse, and add labels to display their identity.
Time to complete: 15 minutes
Modeling Skills
- Selecting groups in the structure viewer window with the mouse
- Saving selections
- Rendering selections separately
About the Model
PDB ID: 6m0j
Protein: SARS-CoV-2 spike receptor-binding domain bound to the ACE2 receptor
Activity: Angiotensin-converting enzyme 2 (Chain A); Spike protein S1 (Chain E); NAG – glycan; Zn2+; Cl–
Description: Receptor for the SARS-CoV-2 pandemic virus
Steps
Load Structure
- Load the structure by typing in the command line: fetch 6m0j, type=pdb1
- Color the two chains differently. In the name/object panel, beside 6m0j, click: C → By chain → By chain (elem C)
Selecting with Mouse
- Notice the carbohydrates shown in stick rendering; these are covalently bonded glycans. Using the mouse, orient the structure and click on each of the five glycans to select them. One glycan will be a different color than the rest (yellow arrow).
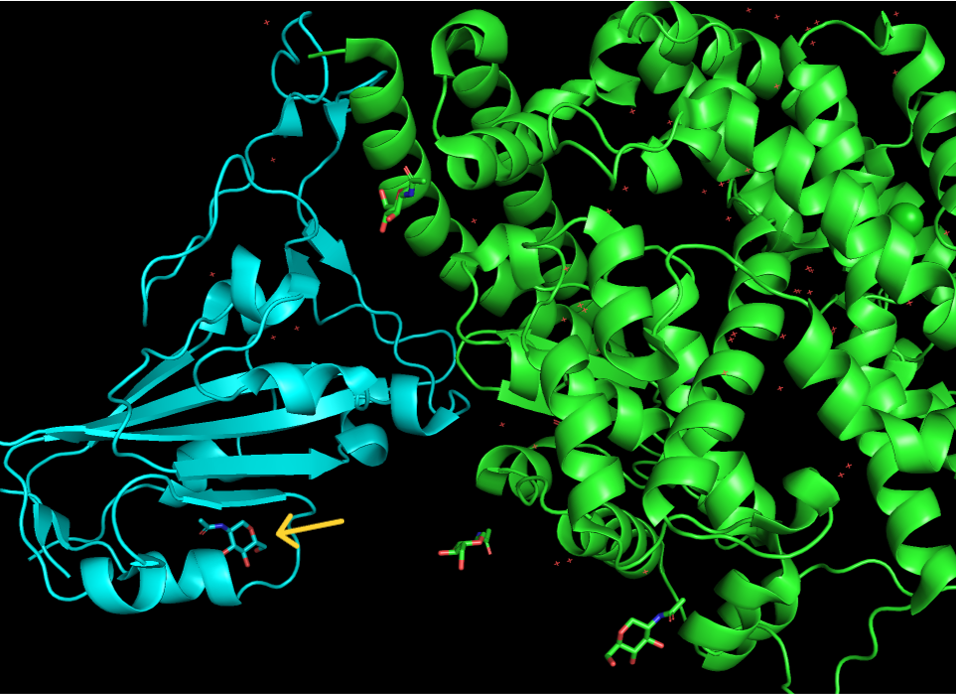
Figure 1: Shows location of differently colored glycan (yellow arrow).
Note: If you mis-select a glycan, click again on the selected part of the structure to deselect it.
- To rename the new selection, click: A → rename selection
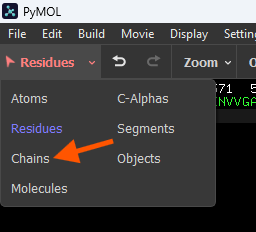
Figure 2: How to change the selection mode from residues to chains (red arrow) - Using the backspace button on keyboard, delete the letters “sele” that appear on the top left-hand side of the structure viewer window, and in place of them, type: glycans
- Click anywhere in the empty space of the structure viewer to clear the selection.
- Now, select the two metal ions by clicking on the spheres. Zn is colored gray, and a Cl ion is colored the same as one of the chains. Rename this selection: ions
- Create a selection for each chain. Top left-corner, below menu bar are the selection controls. It is currently set to “Residues”. Click on it and select “Chains” from the drop-down menu.
- Click on ACE-2, which is the larger protein with a more helical structure. Rename the selection: ACE2.
- Deselect by clicking in the empty space. Now select the Sars-Cov2-Spike S1 Receptor binding domain. Rename the selection: SpikeRBD
Rendering
- In the Names/Object panel, click: ACE2 → C → by element (select one with magenta / pink carbon atoms).
- In the Names/Object panel, click: SpikeRBD → C → by ss (select one with pink loops).
- In the Names/Object panel, click: ions → C → grays → gray70
- In the Names/Object panel, click: glycans → S → spheres
- Then glycans → C → by element (select the one with white carbon atoms) OR try this line command: util.cbaw glycans
Saving a scene to preserve your rendering
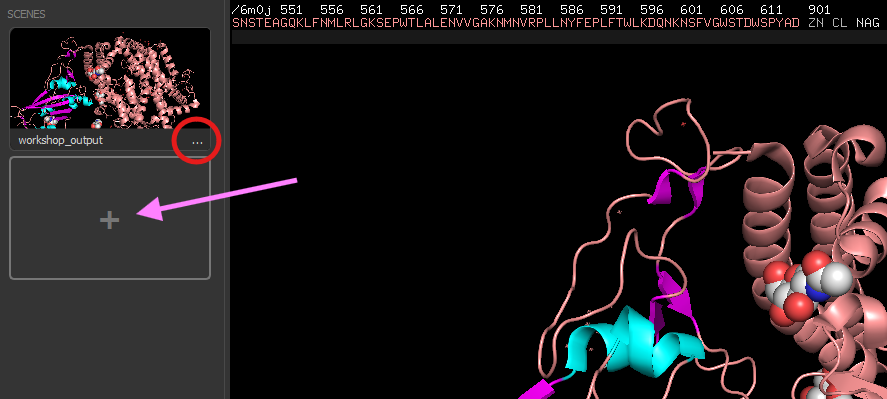
- In the command line, type: scene workshop_output, store
- In Building Buttons, click on ‘Scenes’ and the Scenes panel will appear on the left-hand side.
- In the Names/Object panel, click: 6m0j → show as → surface
- In the Scenes panel, click on the plus (+) sign to add this scene (purple arrow).
- Click on the ellipsis (…) and select ‘Rename’ (red circle — for reference).
- Type: workshop_surface into the pop-up window
- In the Scenes panel, click between ”workshop_output” and “workshop_surface” to see how quickly the visual window changes.
- Select “workshop_out” and in the dropdown menus, click: Display → Background → white to change the background to white.
- Save your PyMOL session file and then export “workshop_out” as a PNG file.
Click here to go to Chapter VI: Selection Tools