
VII.C. Mol* 5Å Selection
Didem Vardar-Ulu and Shane Austin
Overview: This activity demonstrates how use one part of a macromolecular structure to select nearby objects.
Outcome: The user will be able to select a specific part of a macromolecule of interest, display surrounding residues that are within range to interact with the selection, and save these selections.
Time to complete: 15 minutes
Modeling Skills
- Focusing on a specific part of the macromolecule of interest
- Zooming in to show groups within 5 Angstroms
- Creating a standalone component for this selection
About the Model
PDB ID: 1xww
Protein: Low molecular weight protein tyrosine phosphatase
Activity: hydrolyzes Tyr-OPO32- phosphoester bond
Description: single chain, bound SO42- competitive inhibitor, bound glycerol (nonspecific stabilizer)
Steps
Load the Structure
- Go to rcsb.org
- In the search bar at the top, type 1xww and press Enter.
- On the landing page, click the “Structure” tab next to the highlighted “Structure Summary” tab to open the user interface and load the structure.
Note: Moving your cursor on any part of the structure in the 3D canvas or the sequence panel without clicking on it will highlight it in magenta and display information about the PDB ID, model number, instance, chain ID, residue number, and chain name listed at your chosen picking level in the bottom right hand corner of the canvas.
Create temporary components for a target and its 5Å surroundings
- To simplify the view, click on the “eye” icon next to the “Water” component listed in the “Structure Panel” to hide it.
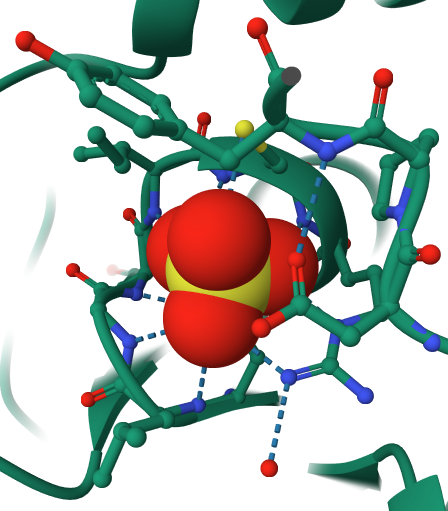
- Find the sulfate ion in the 3D canvas or change the displayed sequence to sulfate ion from the component menu (see Chapter II.C, Figure 2)
- Click the sulfate ion to zoom in and display the surrounding groups within a 5Å radius.
Note: This action also creates two temporary components in the component panel. [Focus] Target represents the clicked target, while [Focus] Surroundings (5Å) represent both the target and the surrounding groups within 5Å. You can modify these components as any other component by clicking on the three dots next to the component to activate the dropdown menu. (Figure 1, arrows 1 & 2)
The default for these temporary components is a “Ball & Stick Representation”. [Focus] Surroundings (5Å) component also shows “Non-covalent Interactions Representation” that includes a subset of noncovalent interactions between the target and the surroundings. (See Chapter VIII for additional information)
Change the representation of sulfate to space-fill (Figures 1 & 2)
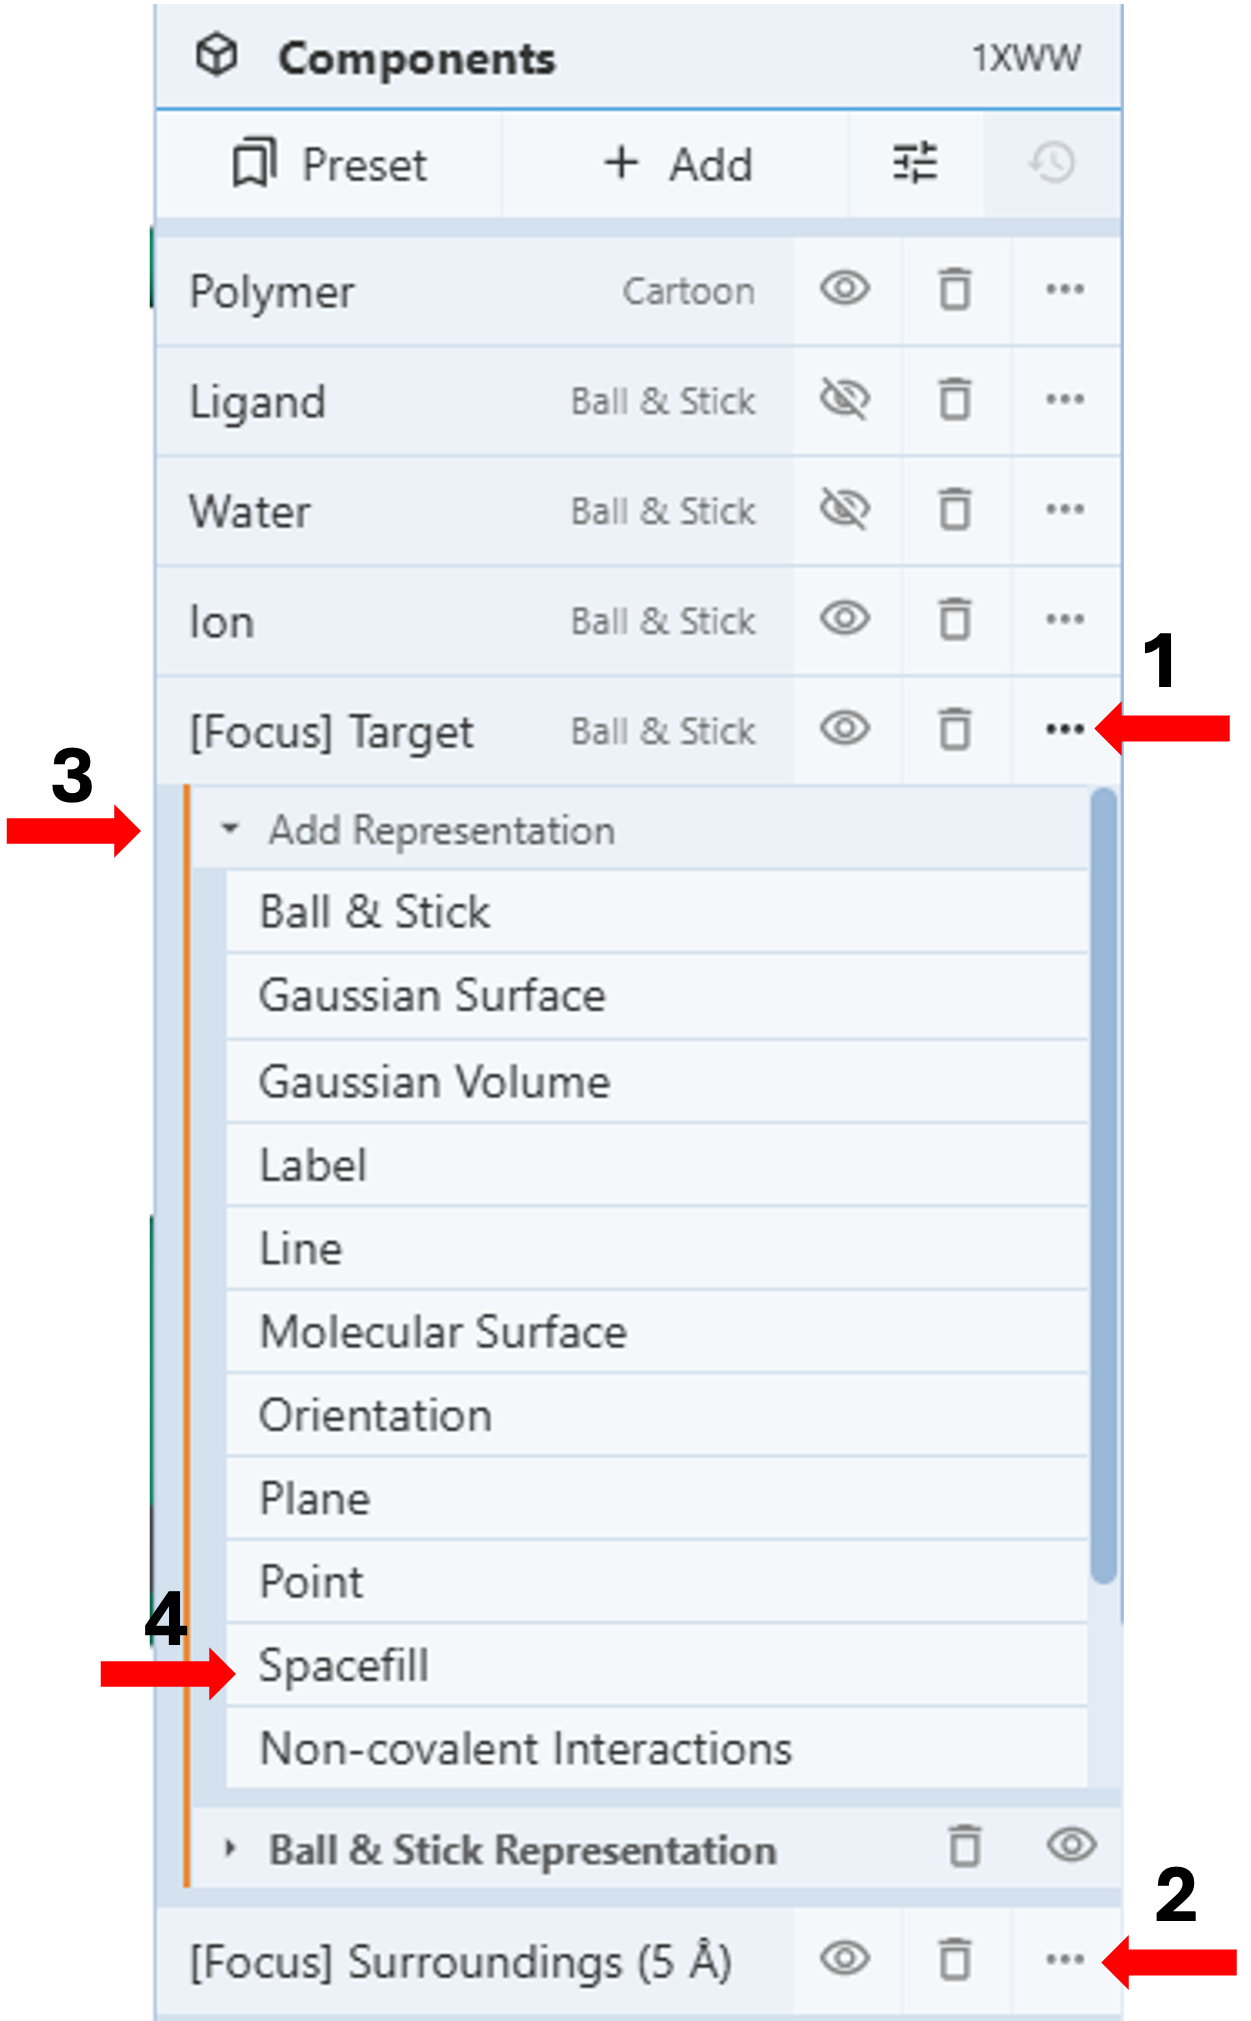
- Click the three dots next to “[Focus] Target”. (Arrow 1)
- Click “Add representation” to activate the drop-down menu (arrow 3) and select “Spacefill”. (Arrow 4)
Create a standalone component for groups within 5Å of the target, excluding the target (Figures 3-5)
-
-
-
-
-
-
-
-
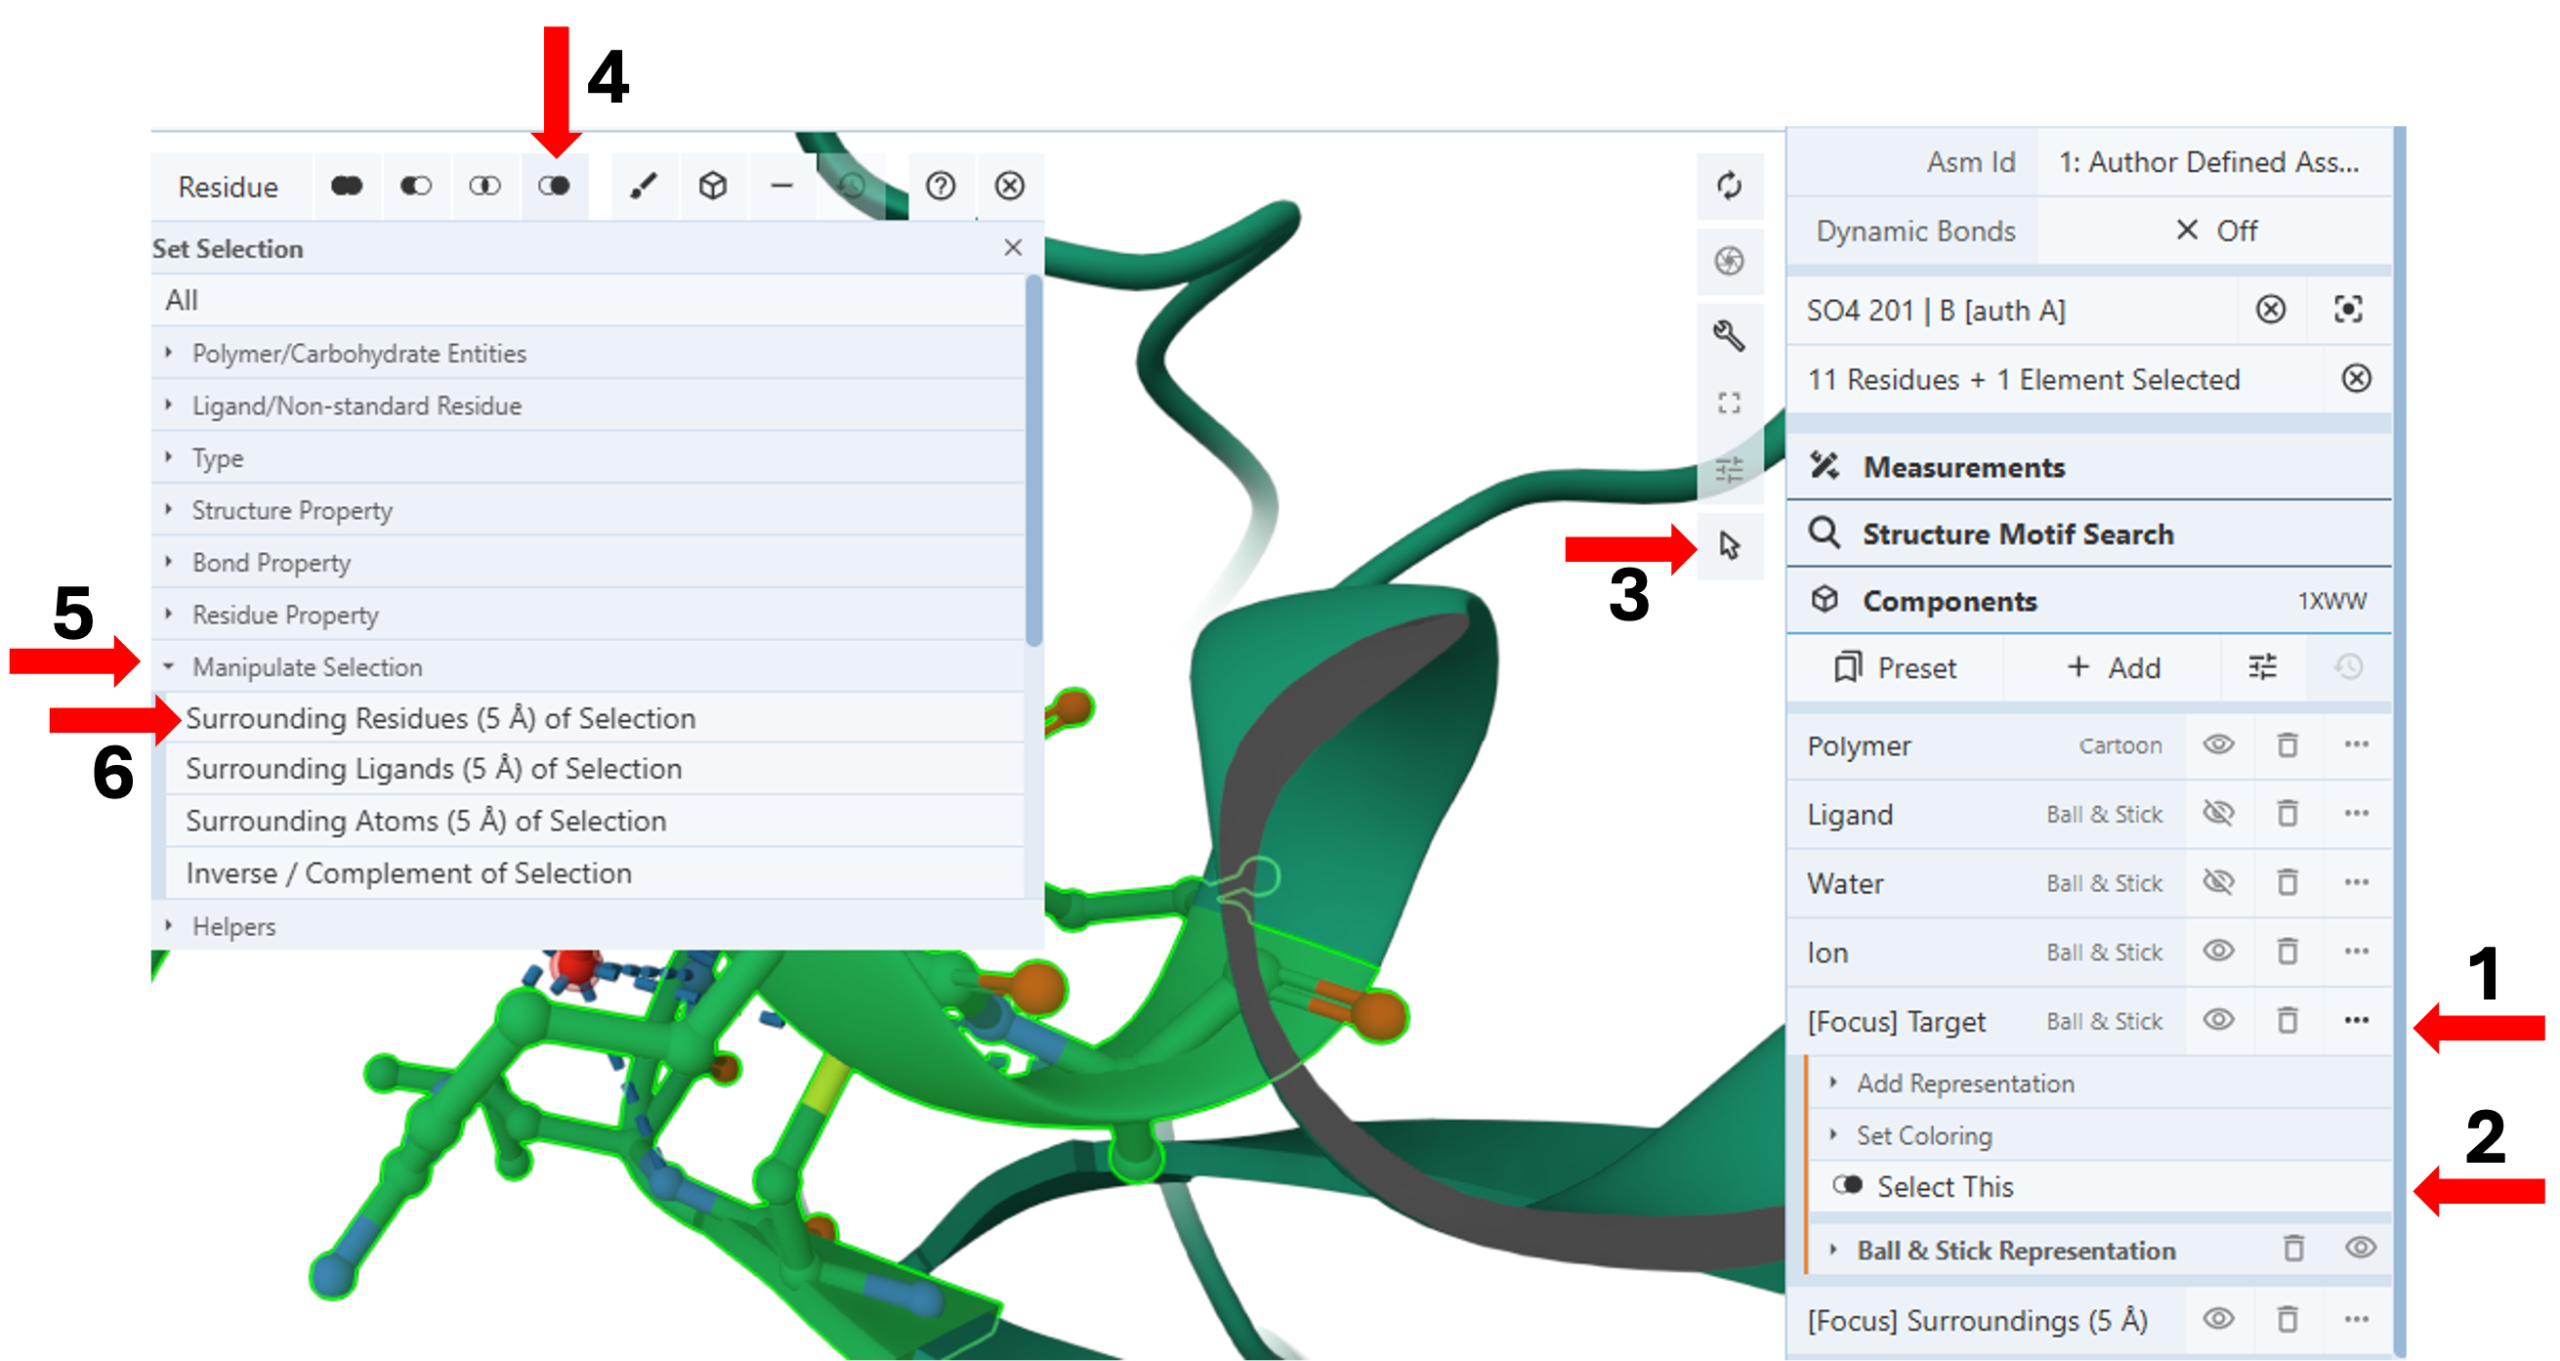
- Click the three dots next to “[Focus] Target” component. (Arrow 1)
- Click the “Select This” icon to select and highlight all groups within 5Å of the target in green. (Arrow 2)
- Activate the “Select Mode Toggle” by clicking the “cursor” icon. (Arrow 3)
- Click the “Set selection” icon. (Arrow 4)
- Click “Manipulate Selection” for the pulldown menu. (Arrow 5)
- Click “Surrounding Residues (5Å) of Selection. (Arrow 6)
-
-
-
-
-
-
-
-
-
-
-
-
-
-
-
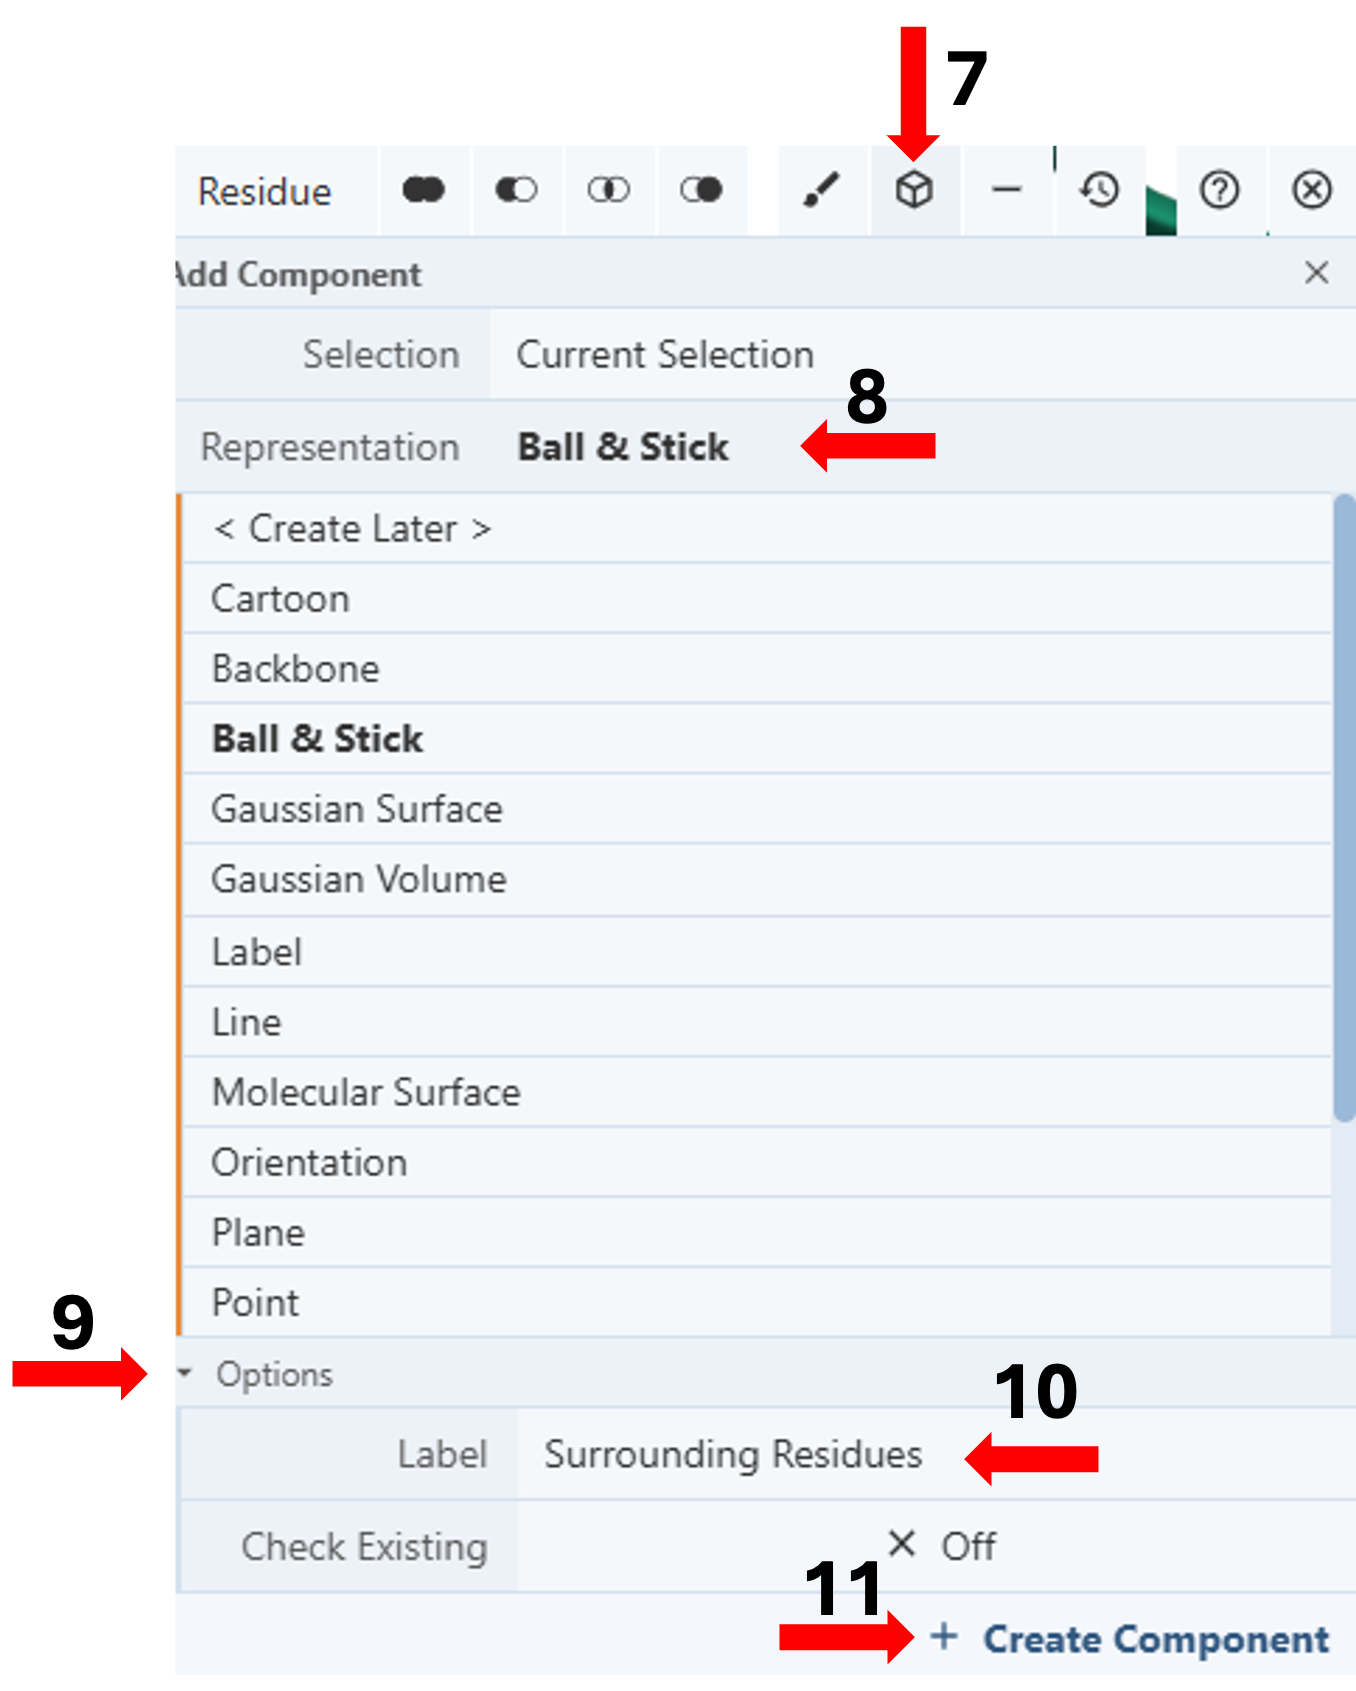
- Click the “Components Icon” (arrow 7) to activate a dropdown menu.
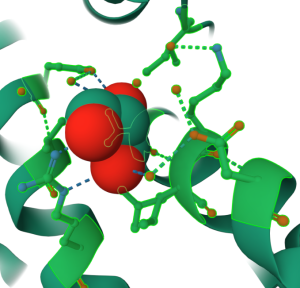
Figure 5: Standalone component for residues shown in ball & stick within 5Å of sulfate anion shown in spacefill of 1xww (click to zoom) - Click the cell next to “Representation” (default “Create Later”) and choose your desired representation (e.g., Cartoon). (Arrow 8)
- Activate the “Options” by clicking on it. (Arrow 9)
- Enter the desired label (e.g., Surrounding Residues). (Arrow 10)
- Click “Create Component”. (Arrow 11)
- Click the “Components Icon” (arrow 7) to activate a dropdown menu.
-
-
-
-
-
-
-

Note: This new component will appear in the Components panel as a standalone component that does not disappear when a new target is clicked. You can also create a standalone component for the target SO4 by repeating step 8 and then directly continuing with steps 14-18.
Jump to the next Mol* tutorial: VIII.C. Mol* Molecular Interactions