
VI.B. iCn3D Selecting on the Sequence and Labeling
Henry V. Jakubowski and Kristen Procko
Overview: This activity demonstrates how to select parts of a macromolecular structure using the sequence display.
Outcome: The user will be able to select parts of a macromolecule using the sequence, and purposefully modify their display.
Time to complete: 15 minutes
Modeling Skills
- Using the sequence to create selections
- Labeling parts of the molecule
About the Model
PDB ID: 1xww
Protein: Low molecular weight protein tyrosine phosphatase
Activity: hydrolyzes Tyr-OPO32- phosphoester bond
Description: single chain, bound SO42- competitive inhibitor, bound glycerol (nonspecific stabilizer)
Steps
Load Structure
- Open iCn3D.
- In List of PDB, MMDB, or AlphaFold UniProt structures, type: 1xww
- Click “load biological unit”.
Select the P-loop Using the Sequence
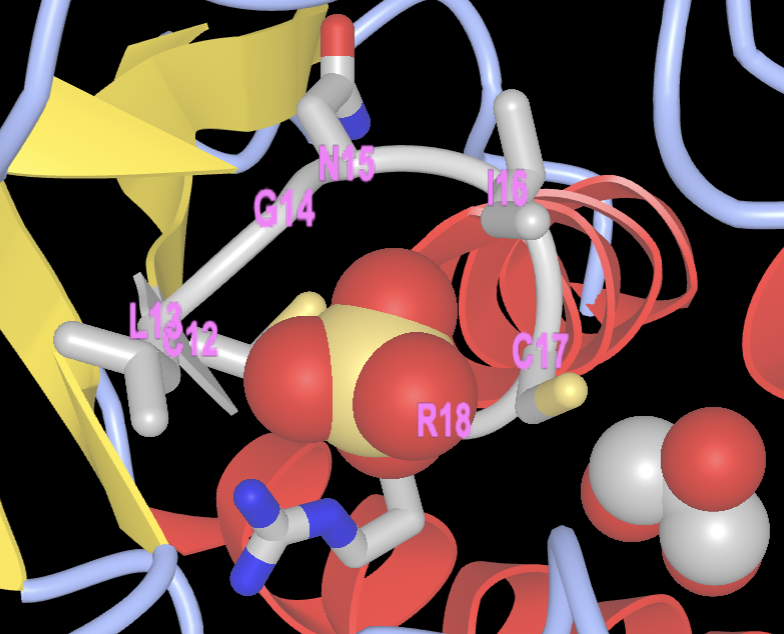
Note: From the literature, it is known that the active site contains a nucleophilic cysteine residue at position 12 in the sequence. It is part of the phosphate-binding loop (P-loop) made up of amino acid residues 12-18 (sequence: CLGNICR). Let’s find, select, and render these amino acids.
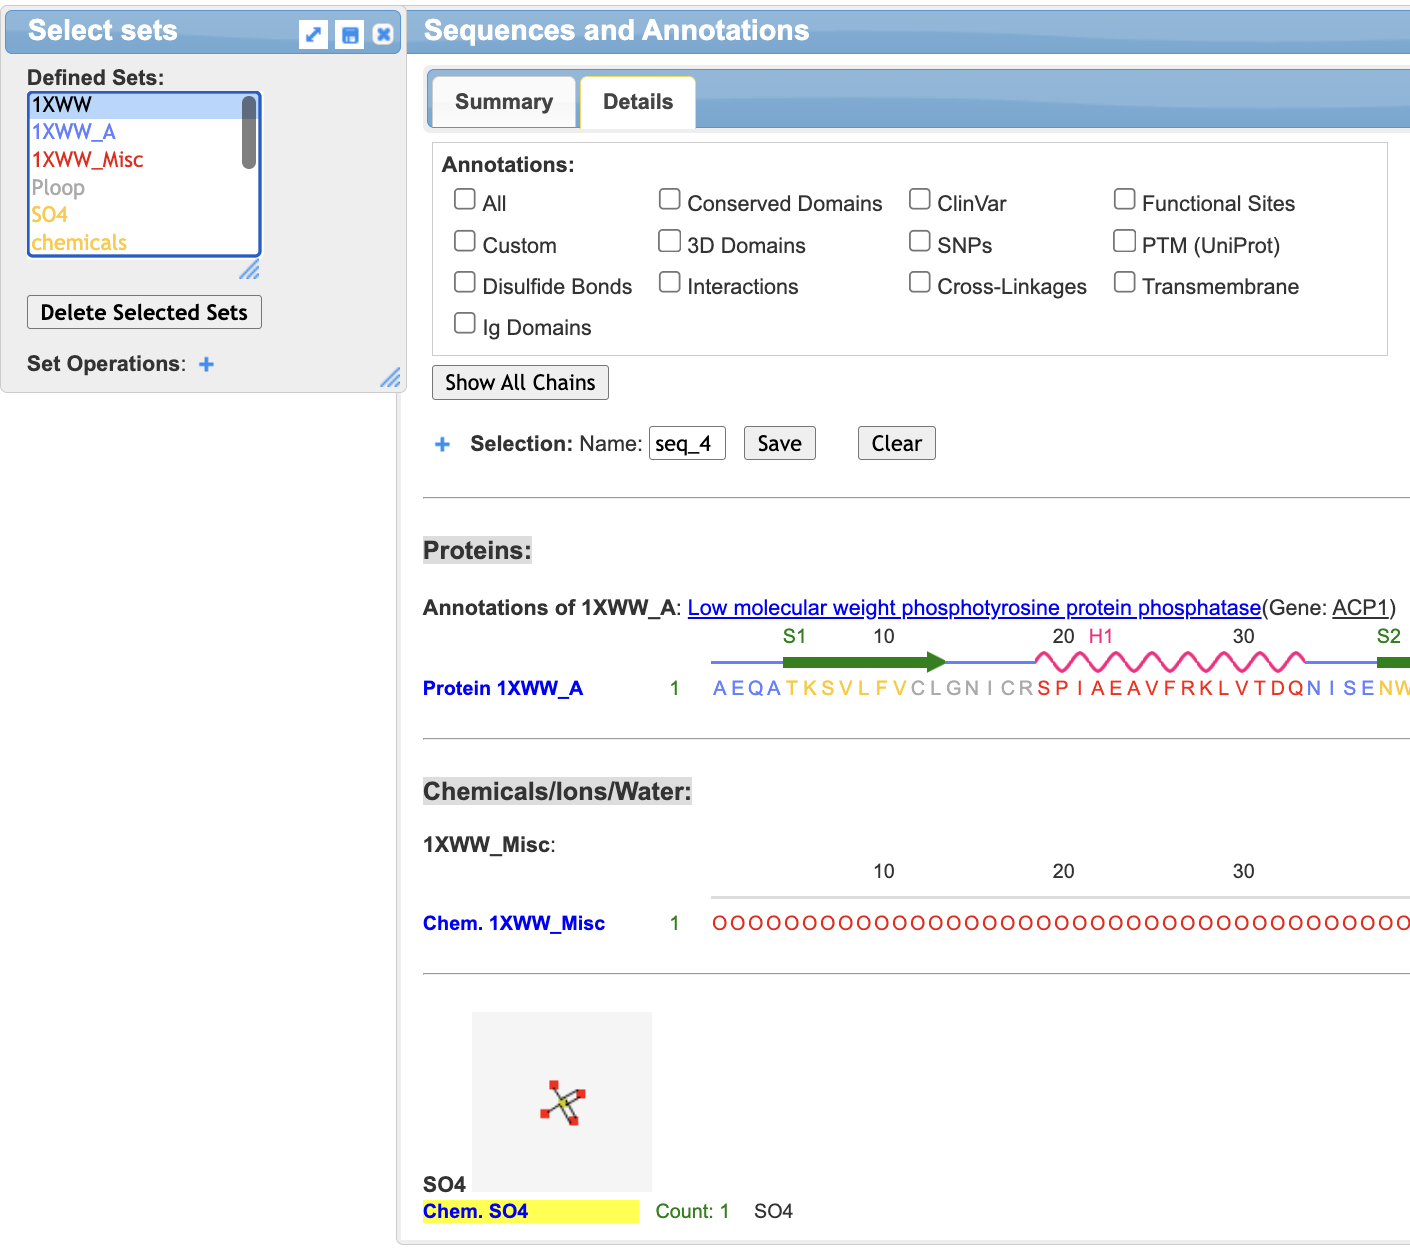
- Use the dropdown menu: Analysis → Sequence and Annotations
- In the Sequences and Annotations popup that appears on the right-hand side of the page:
a) Click on the “Details” tab,
b) Uncheck Conserved Domains
c) Before we continue, look at the already built-in choices you have for selection

- Use “Sequences and Annotations” to select the protein and change its rendering
a) In the Sequences and Annotation window, click Protein 1XWW_A
b) Recolor the protein using the dropdown menu: Color → Secondary Structure → Sheets in Yellow
- Use “Sequences and Annotations” to select the P-loop
a) First, clear the highlight using the dropdown menus: Select → Toggle Highlights
b) Hover over C12 in the sequence, click and drag while sweeping over C12-C18 to select the P loop. (Ensuring you are selecting the correct residues on the sequence can be a little tricky.) The residues will have a yellow highlight when correctly selected:

Save the Selection and Render
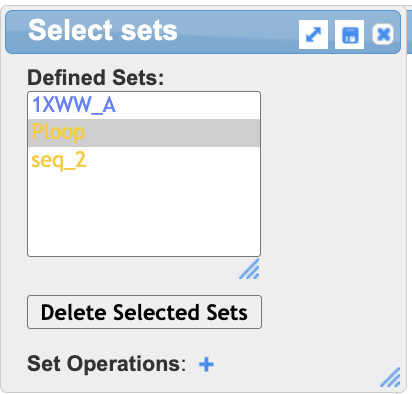
- Save the selection:
a) In the dropdown menu: Select → Save Selection
b) In the selection popup, type: Ploop
c) Click “Save”
- Render the P-loop
a) If “Ploop” is not already selected in the Select Sets popup window, click on it.
b) Use the dropdown menu to render: Style → Side Chains → Sticks
c) Use the dropdown menu to apply CPK coloring: Color → Atom
- Label the P-loop
a) To label, use the dropdown menu: Analysis → Label → Per Residue and Number
b) To change label color, use the dropdown menu: Analysis → Label → Change Label Color (globally)
c) Pick a color using hexacode, type it in the popup window, click “Display”
c) Resize the label using the dropdown menus: Analysis → Label Scale → pick a number that works for you
- Select the sulfate ligand
a) Ensure that 1xww is selected in the “Select Sets” popup window.
b) In the Sequences and Annotation window, click SO4. A yellow highlight will appear:
- Render the sulfate ligand. In the dropdown menu: Style → Chemical → Sphere
- Change the background to white. In the dropdown menu: Style → Background → White
- Save the rendering. In the dropdown menu: File → Share Link → Copy Short URL
Jump to the next iCn3D tutorial: VII.B. iCn3D 5Å Selection