
VI.A. ChimeraX Selecting on the Sequence and Labeling
Walter Novak and Josh Beckham
Overview: This activity demonstrates how to select parts of a macromolecular structure using the sequence display.
Outcome: The user will be able to select parts of a macromolecule using the sequence, and purposefully modify their display.
Time to complete: 15 minutes
Modeling Skills
- Using the sequence to create selections
- Labeling parts of the molecule
About the Model
PDB ID: 1xww
Protein: Low molecular weight protein tyrosine phosphatase
Activity: hydrolyzes Tyr-OPO32- phosphoester bond
Description: single chain, bound SO42- competitive inhibitor, bound glycerol (nonspecific stabilizer)
Steps
Note: From the literature, it is known that the active site contains a nucleophilic cysteine residue at position 12 in the sequence. It is part of the phosphate-binding loop (P-loop) made up of amino acid residues 12-18 (sequence: CLGNICR). Let’s find, select, and render these amino acids.
Load and Prepare the Structure
- Load 1xww. In the command line, type: open 1xww
- Hide all of the displayed residues. Ensure you are in the “Home” toolbar selector and under the “Atoms” toolbar click ”Hide.”
Selecting by Sequence
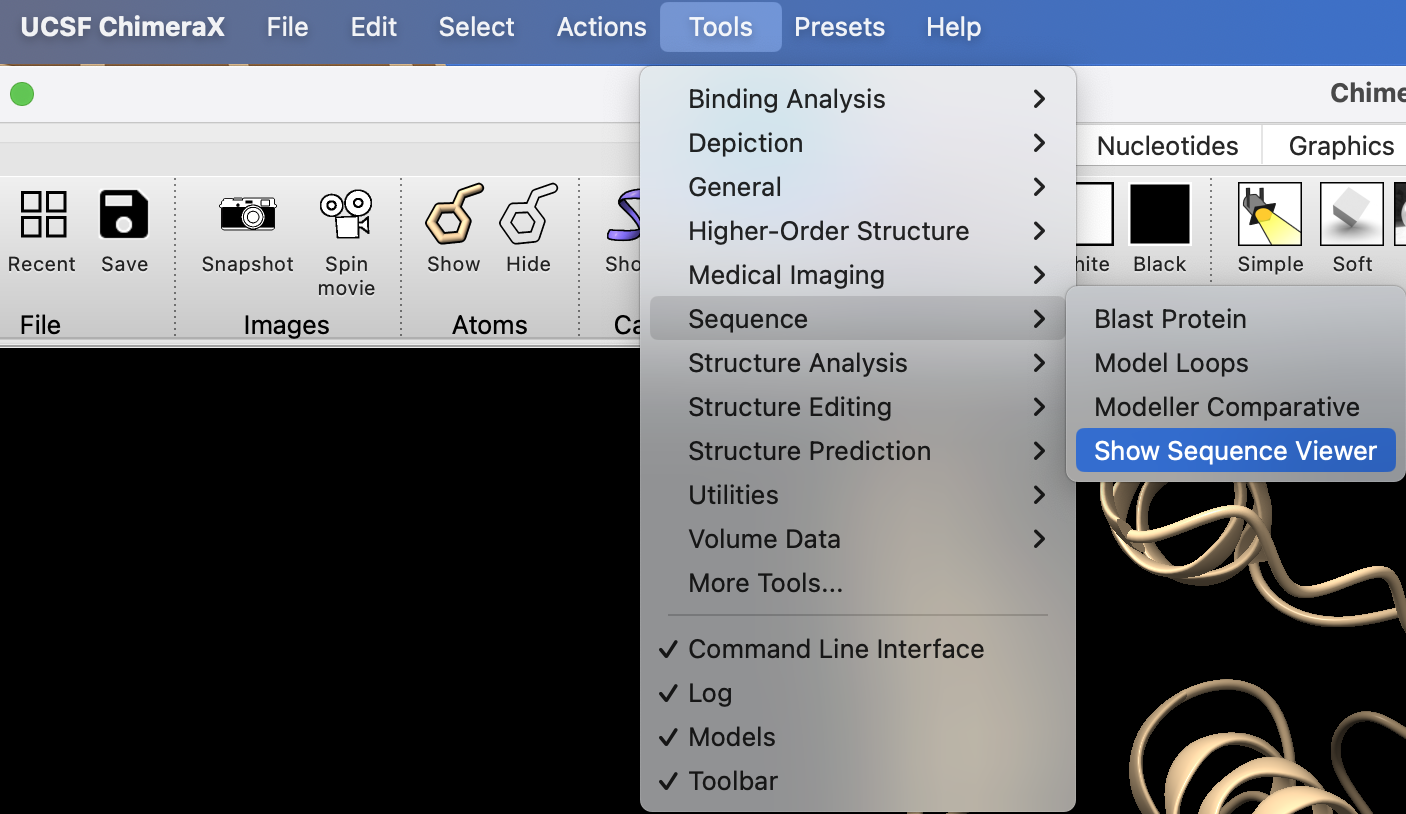
- Turn on the Sequence Viewer. In the pulldown menu, click “Tools” → Sequence → Show Sequence Viewer (Figure 1).
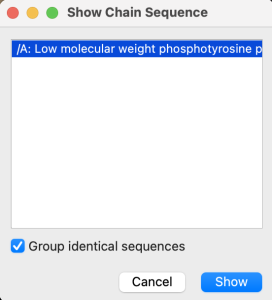
- In the popup window, click “Show” (Figure 2).
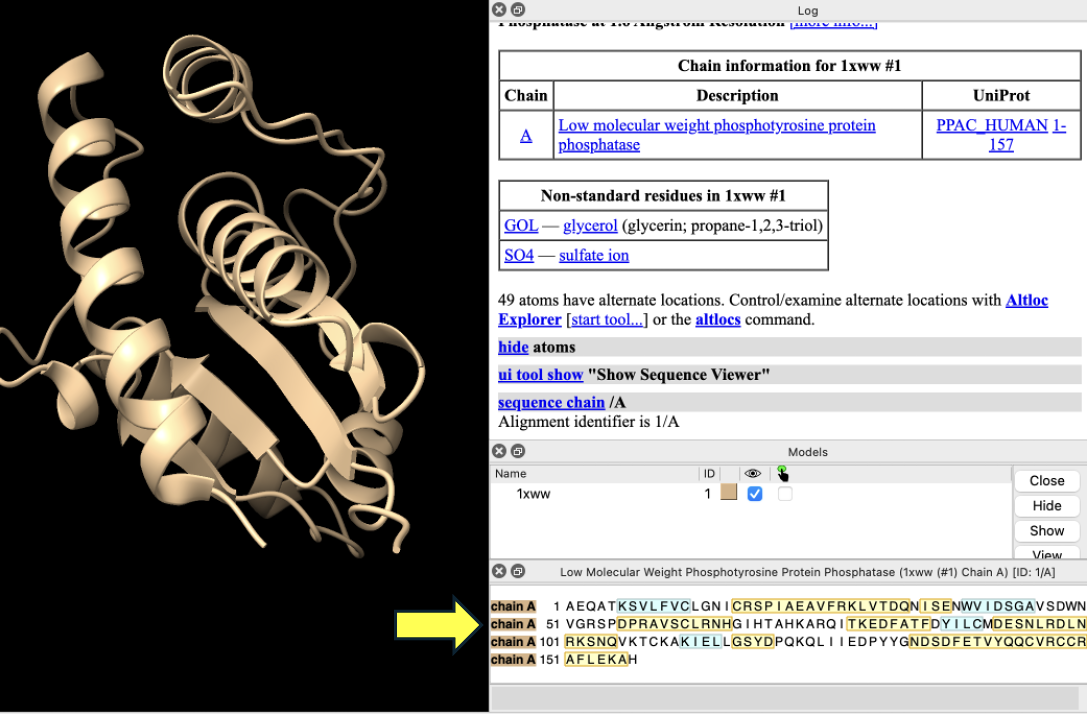
- Click on C12 in the sequence (Note: Hovering over the amino acid in the sequence gives the number), and drag to R18. Notice the residues become highlighted in the sequence and on the structure in the structure viewer window (Figure 3).
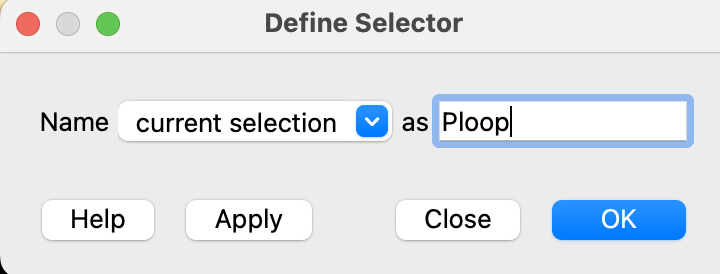
- Define this current selection as “PLoop.” In the dropdown menu: Select → Define Selector. In the popup window that comes up, type Ploop and click “OK”.
- Display the side chains in the P-loop as sticks by clicking “Show” in the “Atoms” area of the “Home” toolbar (Figure 5).
- Make the selection the center of focus. Using the dropdown menu: Actions → Focus.
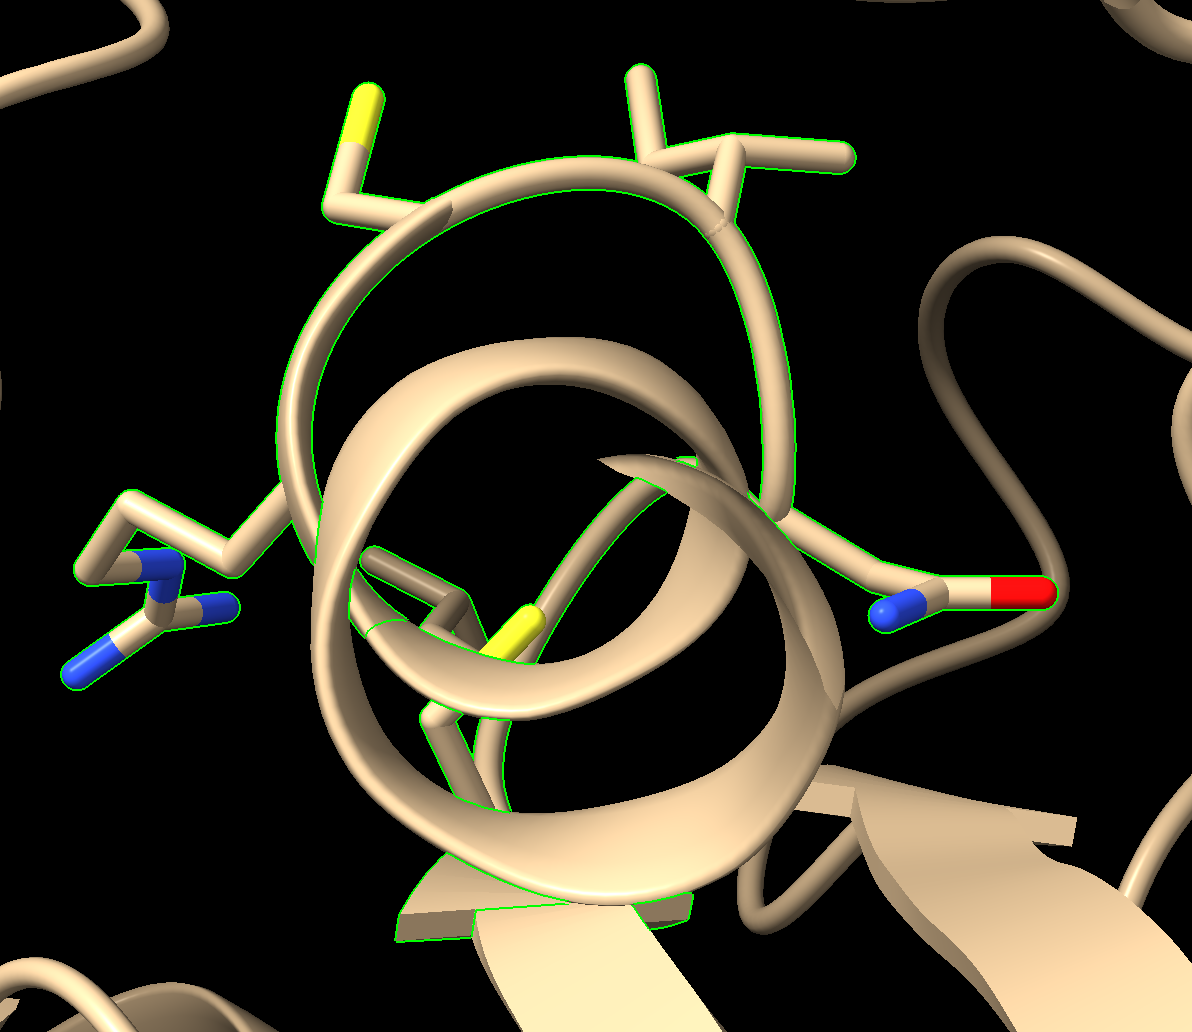
Figure 5: Output from Step 7
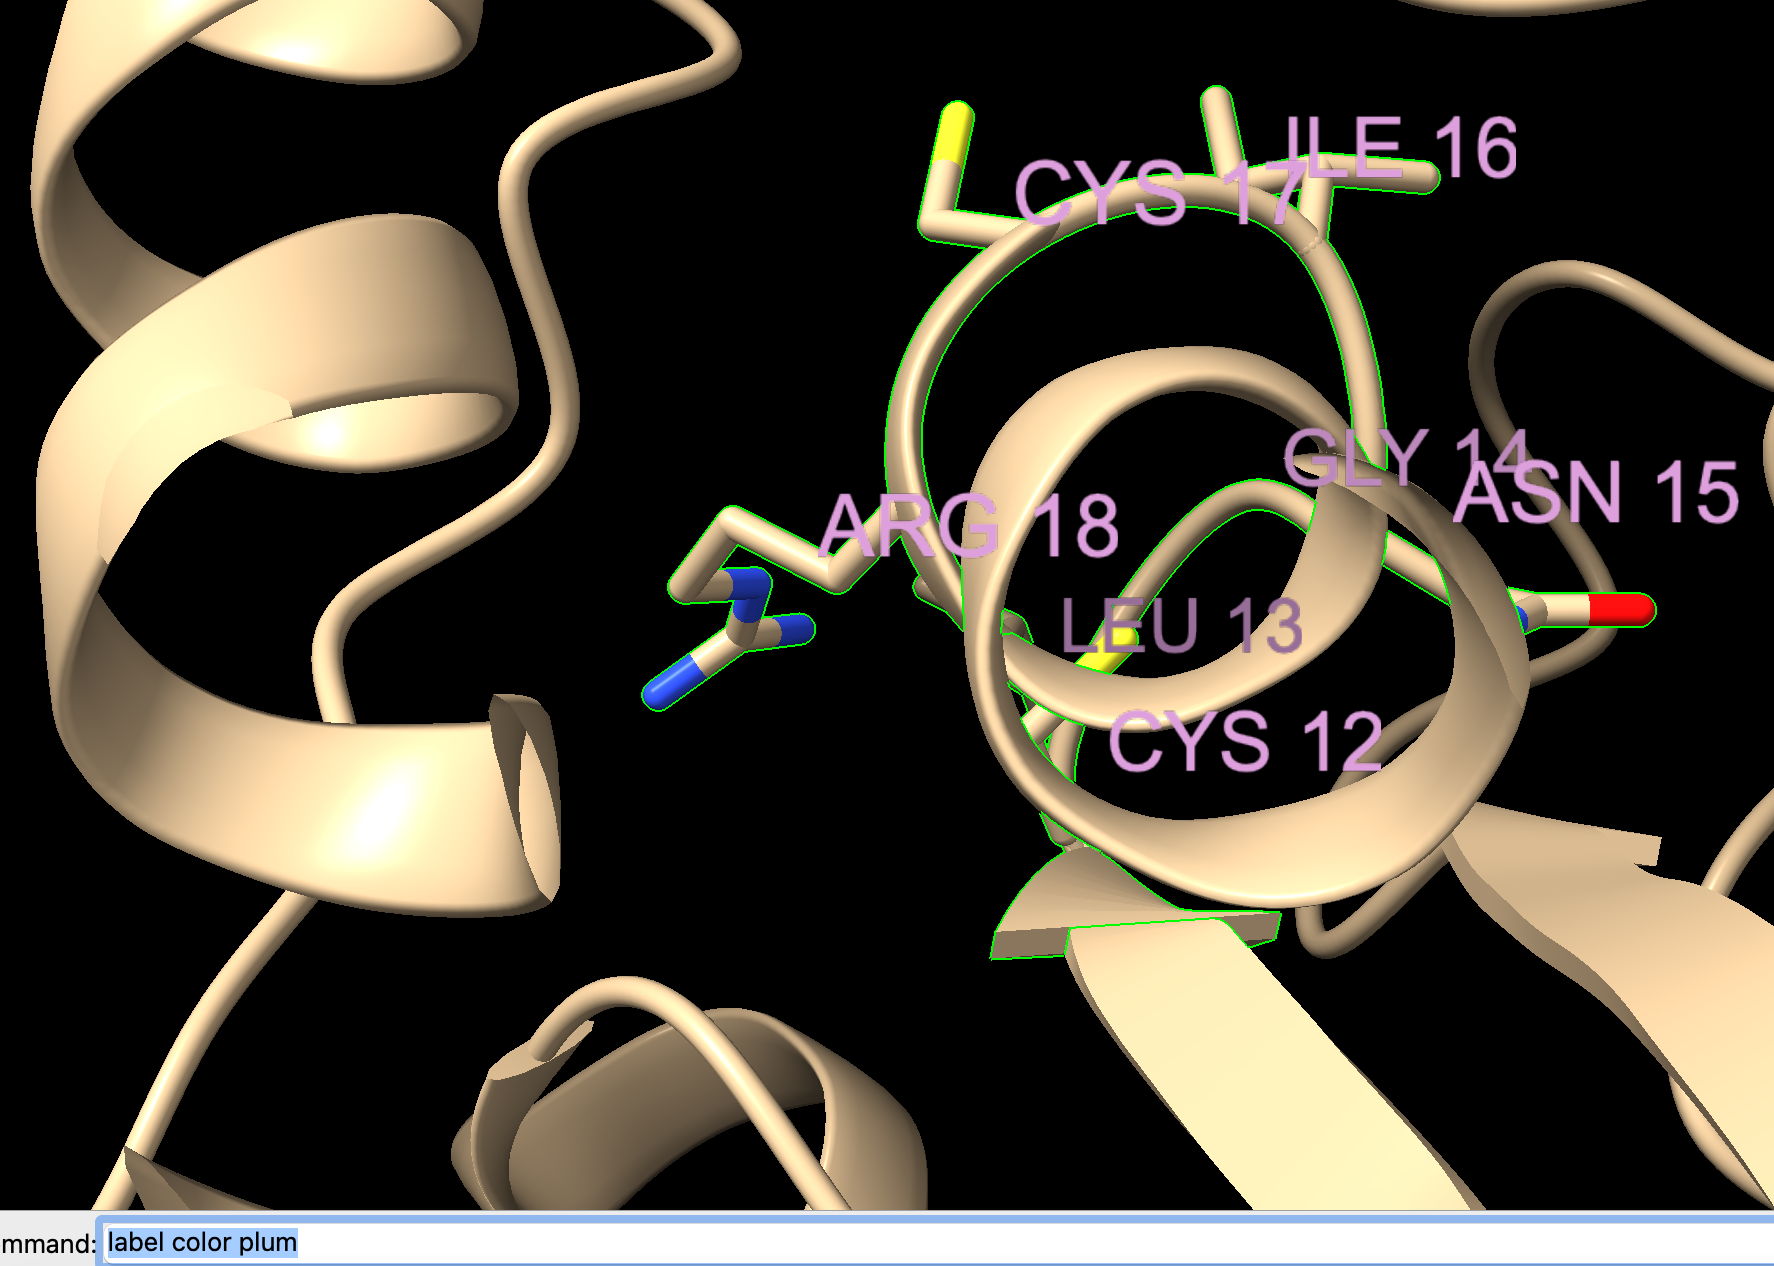
Labeling Residues and Rendering
- Label the residues using the dropdown menu: Actions → Label → Residues → Name and Number.

- Resize the labels to 1.2 Ångstroms.
In the command line, type: label height 1.2
- You may also change the label color in the ”Color Actions” popup window.
a) Dropdown menu: Actions → Color → All Options
b) Ensure “Labels” is checked for “Coloring applies to:”
c) Select the checkbox “Show all colors.”
d) Select “Plum” from the list. (Output shown in Figure 7.)
Note: Alternatively, type in the command line: label color plum
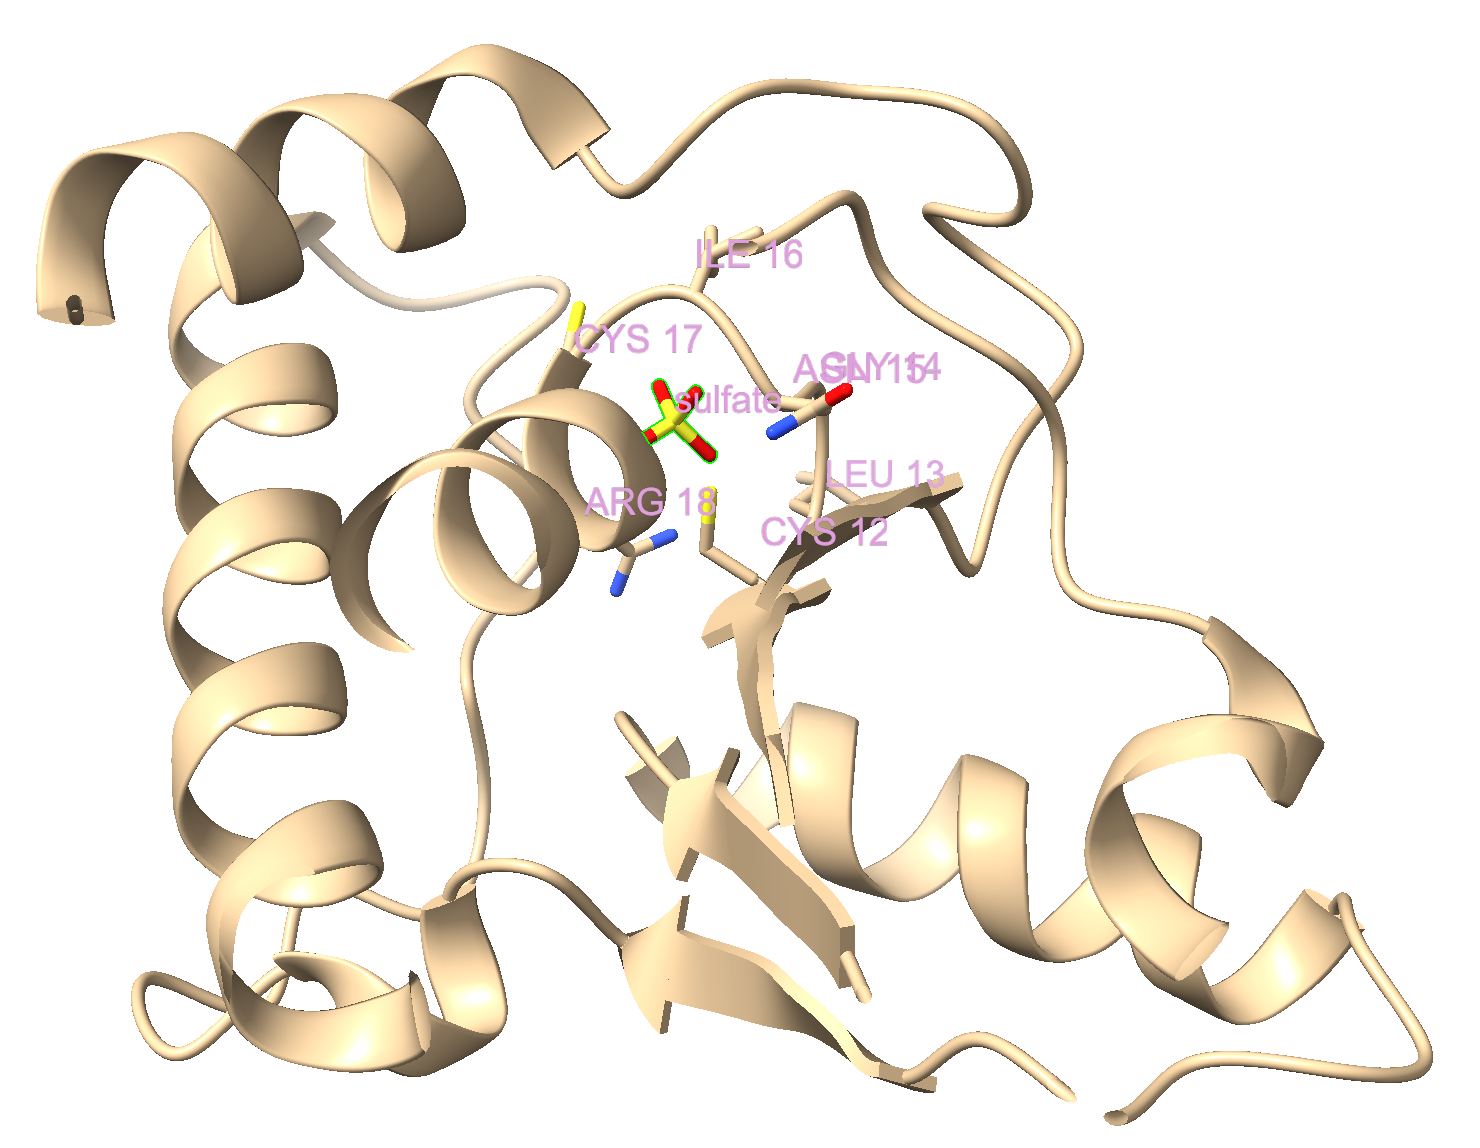
- Display the sulfate as sticks.
a) In the dropdown menu: Select → Residues → SO4.
b) Click “Show” in the Atoms toolbar.
- Give the sulfate a custom label.
a) With the SO4 still selected, use the dropdown menu: Actions → Label → Residues → Custom Text.
b) Type: Sulfate in the box and click “OK.”
c) Make this label size 1.2 and plum-colored. Directions to do this using the command line:
label height 1.2
label color plum
Finishing Up
- Change the background to white in the “Home” toolbar.
- (Optional) Save and close the session.
Jump to the next ChimeraX tutorial: VII.A. ChimeraX 5Å Selection.