
I.C. Getting Started with Mol* (Molstar)
Didem Vardar-Ulu and Shane Austin
Overview: This chapter presents the Mol* interface, guides the user to load a structure, and introduces trackpad and mouse controls.
Outcome: The user will be able to load a file in Mol*, perform basic manipulation (zoom, rotate, and center), and save the file as a PNG image and save all work ( as a Mol* session).
Time to complete: 5–10 minutes
Modeling Skills
- Load a structure into the modeling program.
- Perform basic structure manipulation (e.g., zoom and rotate) with a trackpad or mouse.
About the Model
PDB ID: 3fgu
Protein: Catalytic complex of Human Glucokinase
Activity: One isoform of the enzyme that phosphorylates glucose in the first step of glycolysis
Description: single chain, with four bound ions and molecules. Potassium ion (K+) is from the crystallization medium and non-essential for biological function. Bound catalytic magnesium (Mg2+). Bound substrate: beta-D-glucose, and bound substrate analog phosphoaminophosphonic acid-adenylate ester (ANP). ANP is a non-hydrolyzable analog of ATP, thus this structure captures a similar view to the catalytic complex (enzyme-substrate complex).
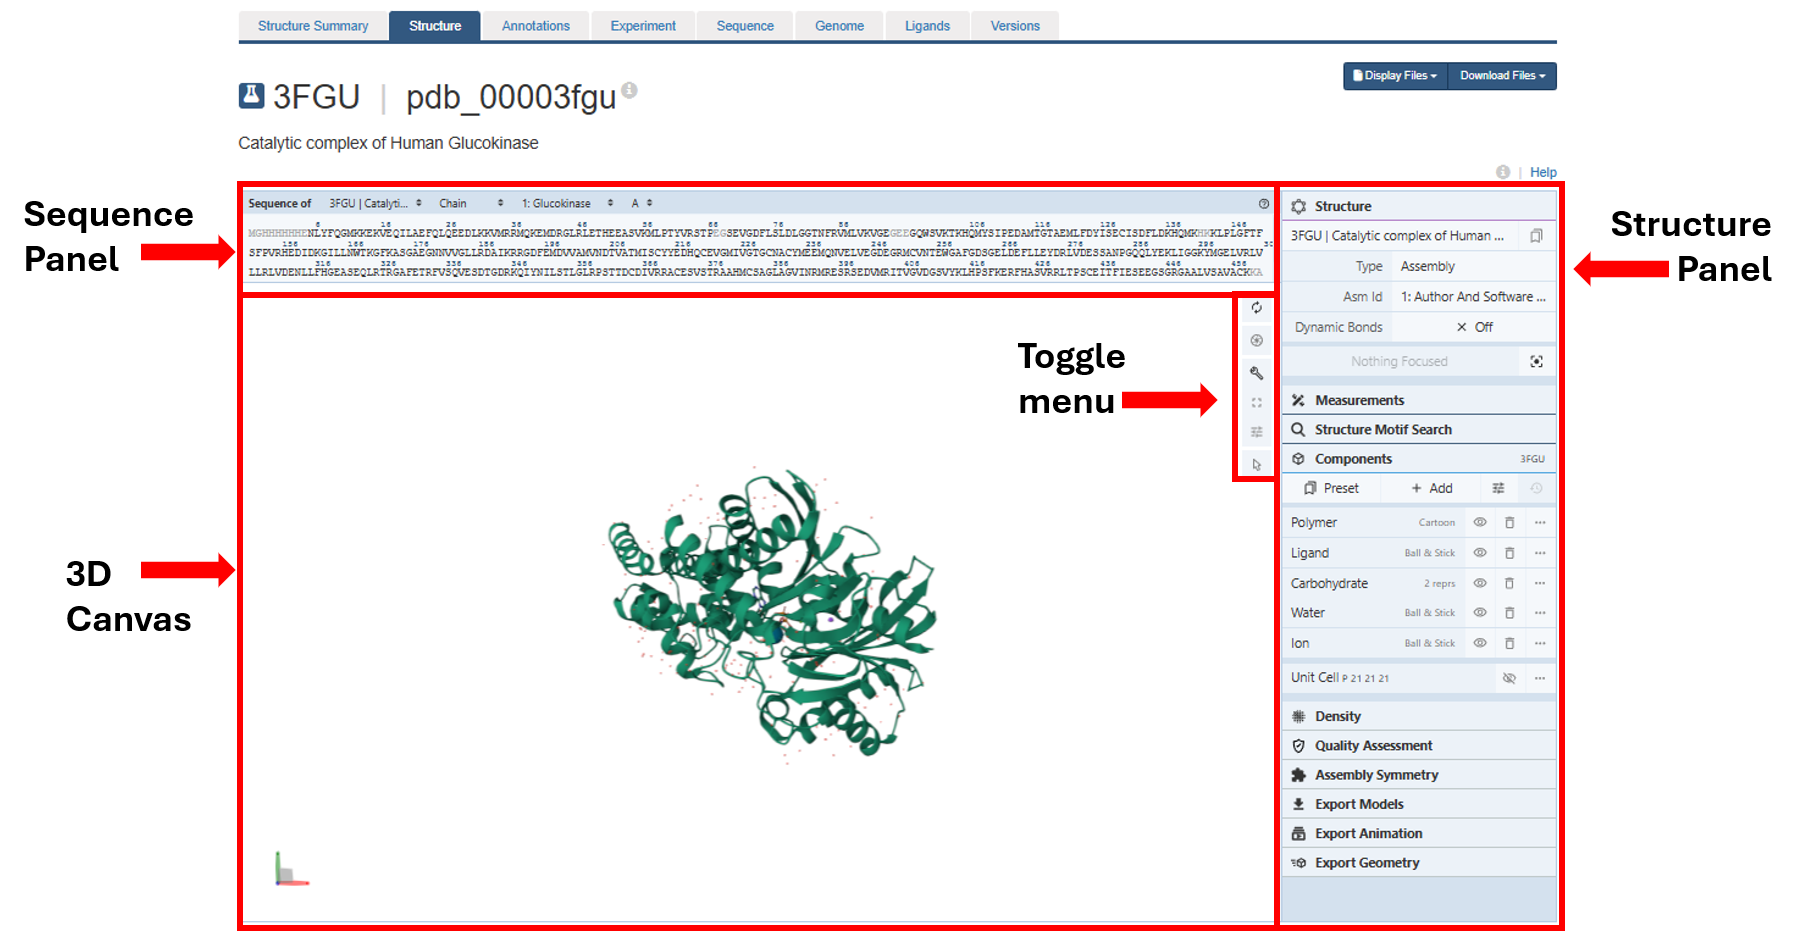
The Mol* Interface
Throughout these tutorials, we will refer to the following parts of the interface (Figure 1):
Steps
- Go to www.rcsb.org
- In the search bar at the top, type: 3fgu and press Enter.
- On the landing page, click on the “Structure” tab next to the highlighted “Structure Summary” tab. (Figure 1)

- Now, familiarize yourself with basic structure manipulation using the guide below. Based on your specific trackpad, mouse or touch screen functionality, these may vary slightly. Play around to see how yours works.
- rotate: click the left mouse button and move. Alternatively, use the Shift key + left mouse button and drag to rotate the canvas. On a touchpad, click with two fingers and move. On a Mac with touchscreen device, use a single finger to click and drag to rotate.
- zoom: use the mouse wheel. On a touchpad, use a two-finger drag. On a touchscreen device, use two fingers to pinch.
- translate: click the right mouse button and move. Alternatively, use the Control button + the left mouse button and move. On a touchpad, use the Control key + click + two-finger drag. On a touchscreen device, use a two-finger drag. On a mac with a touch pad, control-click and drag to translate.
- center and zoom: use the right mouse button on the touchpad to click on the part of the structure you wish to focus on. On a touchscreen, single tap on the part of the structure you wish to focus on.
- to reset Zoom: click a white space on the canvas.
Save a file and an image
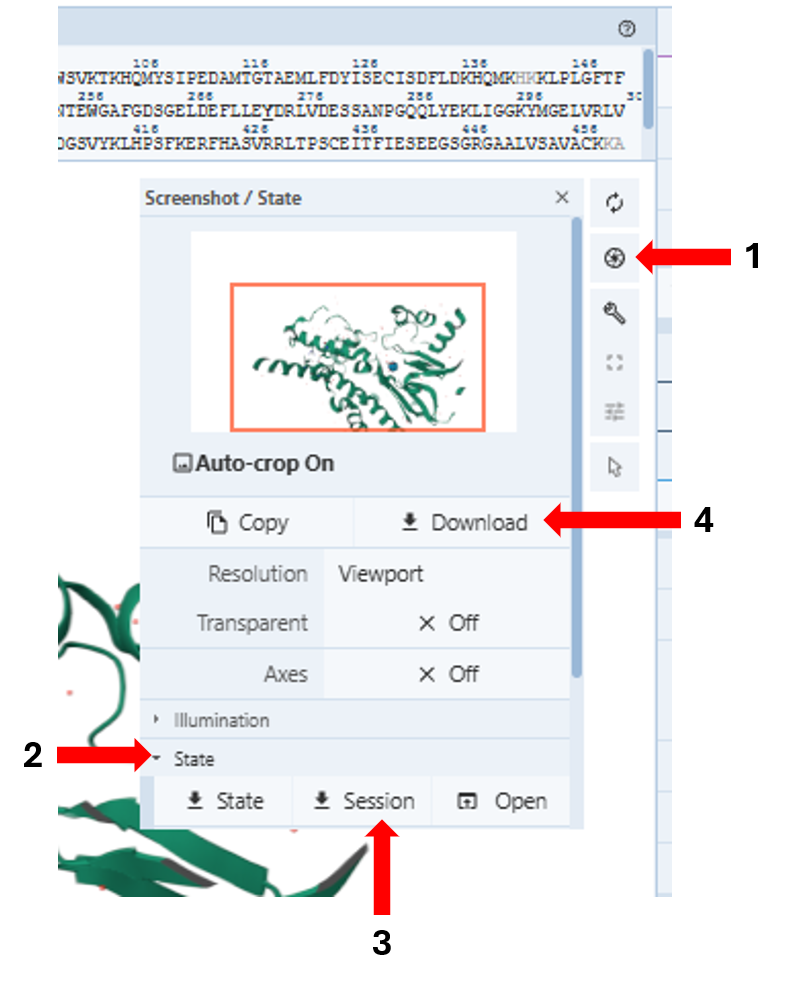
- Save the file in two ways (Figure 3):
- Save a PNG image:
- Click the wheel icon on the toggle menu (Arrow 1), which will open a new window
- Click “Download” (Arrow 4) and a .png file will be saved onto your computer.
- Save a Mol* session file:
- Click the wheel icon on the toggle menu (Arrow 1), which will open a new window
- Click the “State” button and scroll down to find the three options: State, Session, and Open (Arrow 2)
- Click “Session” (Arrow 3) to download the session file (.molx) onto your computer.
- To re-open a saved session file:
- Click the wheel icon on the toggle menu (Arrow 1), which will open a new window
- Click the “State” button and scroll down to find the three options: State, Session, and Open (Arrow 2)
- Click “Open” (next to Arrow 3) and a pop-up will allow you to upload your saved session file (.molx).
- Save a PNG image:
Jump to the next Mol* tutorial: II.C. Mol* Alternative Renderings