
I.D. Getting Started with PyMOL
Roderico Acevedo and Kristen Procko
Overview: This chapter presents the PyMOL interface, guides the user to load a structure, and introduces trackpad and mouse controls.
Outcome: The user will be able to load a file in PyMOL, perform basic manipulations (zoom, rotate, and center), save a PNG file and save all work (for PyMOL, this is a session file).
Time to complete: 5–10 minutes
Modeling Skills
- Load a structure into the modeling program.
- Perform basic structure manipulations (e.g., zoom and rotate) with a trackpad or mouse.
About the Model
PDB ID: 3fgu
Protein: Catalytic complex of Human Glucokinase
Activity: One isoform of the enzyme that phosphorylates glucose in the first step of glycolysis
Description: Single chain, with four bound ions and molecules. Potassium ion (K+) is from the crystallization medium and non-essential for biological function. Bound catalytic magnesium (Mg2+). Bound substrate: beta-D-glucose, and bound substrate analog phosphoaminophosphonic acid-adenylate ester (ANP). ANP is a non-hydrolyzable analog of ATP, thus this structure captures a similar view to the catalytic complex (enzyme-substrate complex).
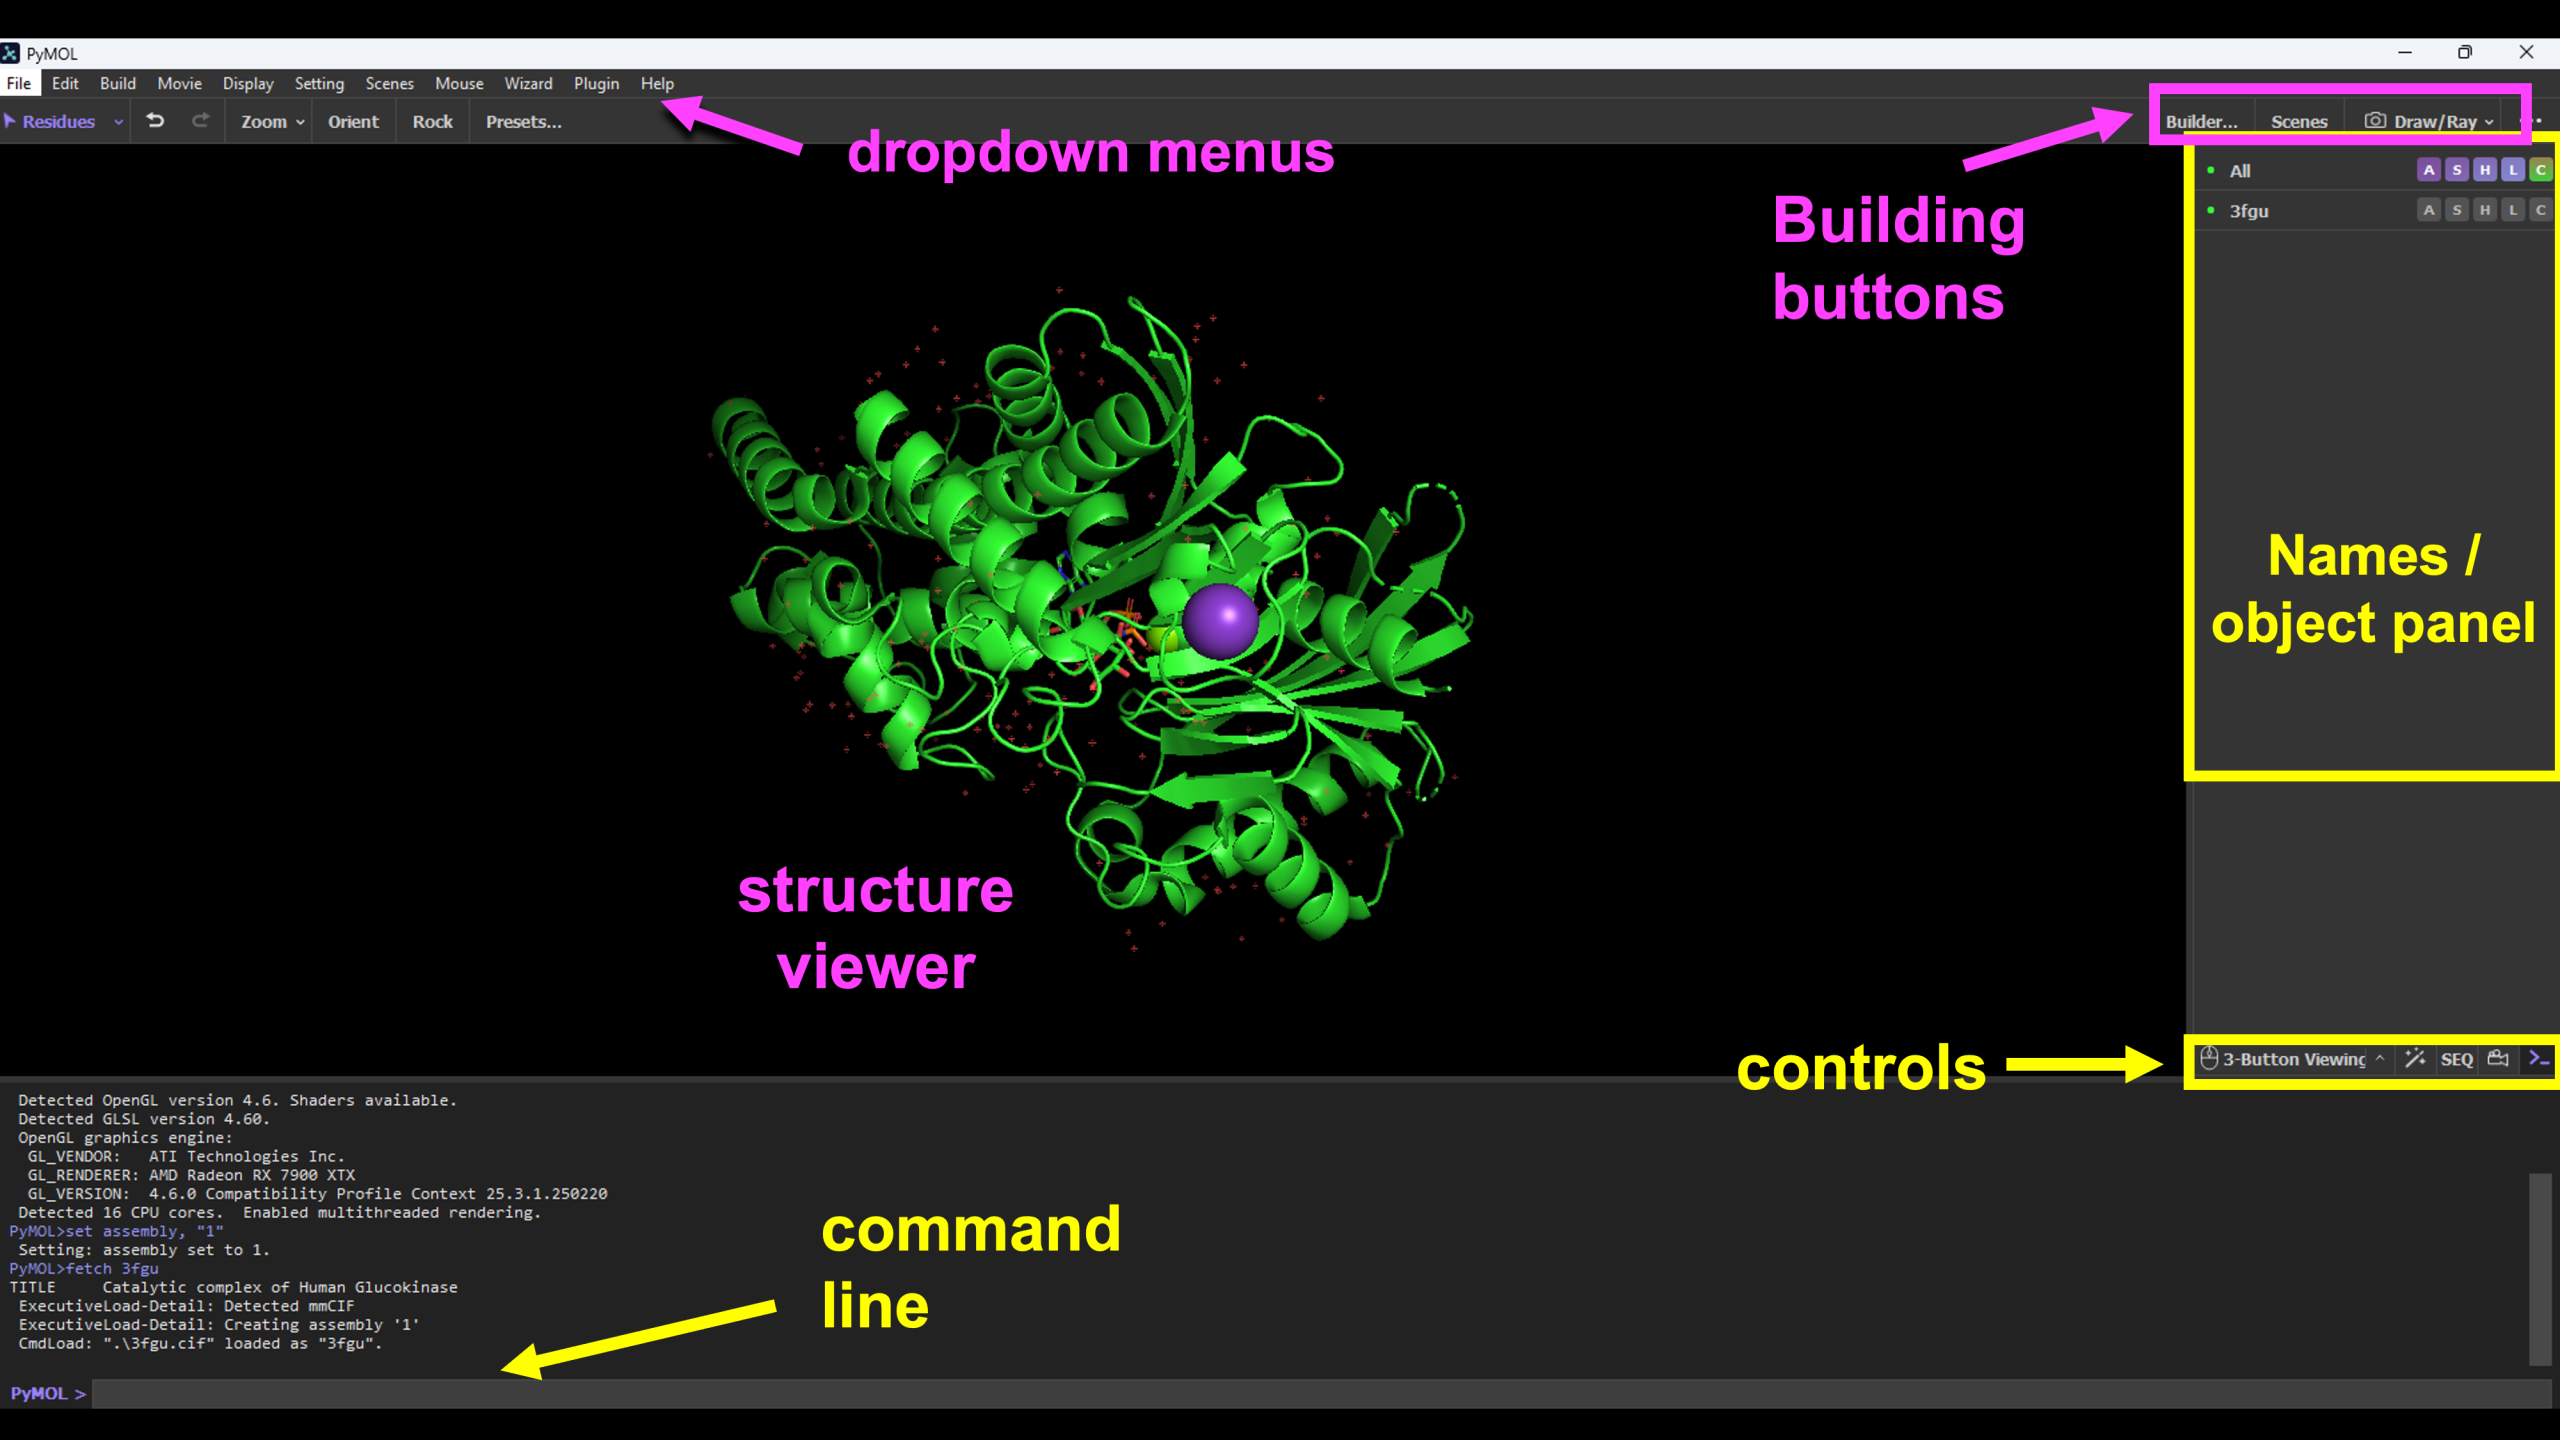
The PyMOL User Interface
Throughout these tutorials, we will refer to the following parts of the interface:
Steps
-
Open PyMOL by double-clicking on the application
-
In the top command line, type: fetch 3fgu, type=pdb1
Note: The default render is ribbon (cartoon) with black background, and small molecules shown as sticks or spheres.
- Now, familiarize yourself with basic structure manipulation using the guide below. Based on your specific trackpad or mouse, these may vary slightly. Play around to see how yours works.
- rotate: click and drag (mouse: left click and drag)
- zoom: pinch and spread (mouse: right click and drag)
- translate: ctrl+ click and drag (mouse: command + left click and drag); mac: command button
- re-center: right hand names/object panel → A button → orient or center
- another option to re-center, once a selection is made, is to right-click and choose “center(vis)” in the popup menu
- Position and zoom the structure as desired.
- Save the file in two ways:
-
- Save a png image
- In Building buttons panel, click on Draw/Ray.
- elect either “Draw(fast)” or “Ray(slow)”. Ray has higher quality rendering, but it is slower.
-
Save a PyMOL session file
-
Go to File –> Save session. Type a filename in the box and click “Save.”
-
- Reopen a PyMOL session file
- In the dropdown menu, click: File → Open
- In the popup menu, select the PyMOL session file (.pse)
- Save a png image
Note: The option to “Draw(fast) or “Ray(slow)” will be remembered for the rest of the session. It will not appear again unless the session is restarted.
-
-
- Click “Save Image to File” or “Copy Image to Clipboard”.
-
If “Save Image to File” is chosen a pop-up box will appear and allow you to type a filename and click “Save.”
-
Note: An alternative way to save a .png file is by using the dropdown menu. In the dropdown menu, click: File → Export Image As → PNG. This will bring up a popup box that will allow you to select between the following options: capture current display (screenshot, includes all PyMOL windows), draw antialiased OpenGL image (fast), and ray trace with opaque or transparent background (slow). Select an option and click: Save png as… to bring up the save popup window.
Click here to go to Chapter II: Alternative Renderings