
VIII.D. PyMOL Molecular Interactions
Roderico Acevedo and Kristen Procko
Overview: This activity demonstrates how to use one part of a macromolecular structure to select nearby objects.
Outcome: The user will be able to focus on a specific part of a macromolecule of interest, display its surrounding residues, and visualize noncovalent interactions within a 5Å radius of the target.
Time to complete: 15 minutes
Modeling Skills
- Focusing on a specific part of the macromolecule of interest
- Selecting objects using the command line
- Selecting groups within 5Å
- Displaying noncovalent interactions
About the Model
PDB ID: 1xww
Protein: Low molecular weight protein tyrosine phosphatase
Activity: Hydrolyzes Tyr-OPO32- phosphoester bond
Description: Single chain, bound SO42- competitive inhibitor, bound glycerol (nonspecific stabilizer)
Steps
Determine active site residues
- Reload 1xww using the command line. Type: fetch 1xww, type=pdb1
- Hide the waters in the structure. Type: hide nonbonded
- Select the sulfate using the command line. Type: select sulfate, resn SO4
- In the names/object panel, beside sulfate, click: S → as → sticks
- Use this selection to define the area around the ligands by first duplicating it, click on sulfate → A → Duplicate. Then, click on sel01 → A → rename selection. Using the keyboard, delete the letters “se101” and type: active
- Modify this selection to show residues within 5 Å. In the names/object panel. Click: active → A → Modify → Around → residues within 5 Å.
- To show these residues as sticks, click: active → S → Sticks. Finally, click in the empty space in the Structure Viewer to clear the selection.
Show active site water using graphical interface
- In the names/object panel, beside active: A → Duplicate. To rename the selection, click on Sel02 → A → Rename Selection. Delete the letters in the renaming menu that appears in the top right of the structure viewer, and type: active_water
- To adjust the new selection to contain active site water molecules, click: active_water → A → Modify → Around → Atoms Within 4 Angstroms.
- To modify this further and limit to water molecules, click on Active_water → A → Modify → Restrict → To Solvent.
- Finally, to make the water spheres, click on Active_water → A → Preset → Ball and Stick
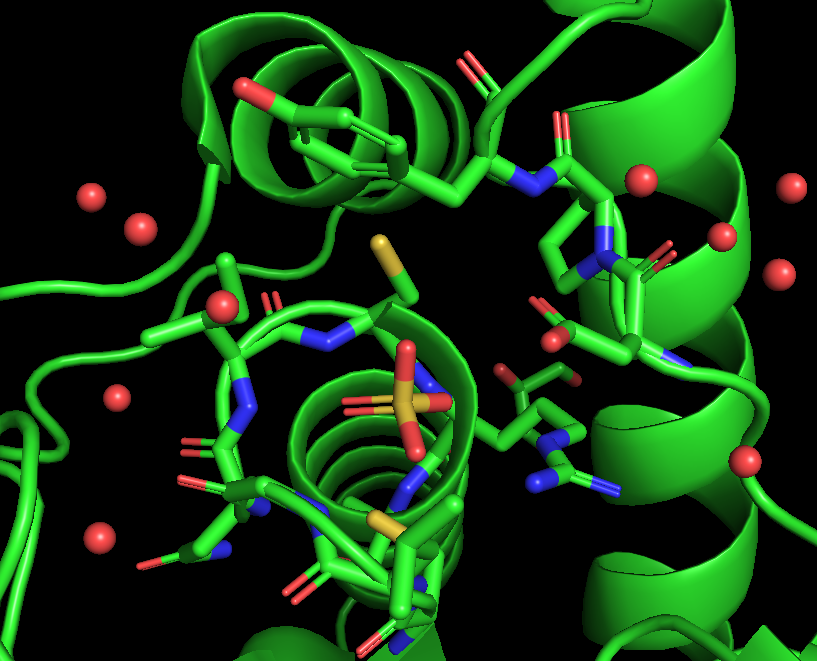
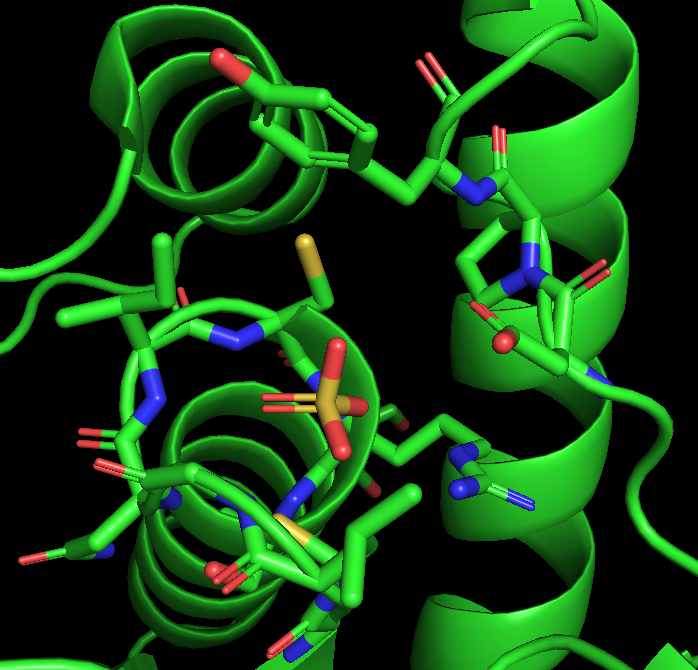
Figure 2: Results from determining the active site waters
Note: The GUI allows selection within 4 Å; line commands allow selection of a more appropriate distance of 3.3 Å for hydrogen bonding water molecules. The van der Waals radii of the spheres cannot be set in the GUI, but the “ball and stick” selection is close to 0.5 Å.
Show active site water using command line
- Reload 1xww using the command line. Type: reinit
- Type: fetch 1xww, type=pdb1
- Hide the waters in the structure. In the command line, type: hide nonbonded
- Select the sulfate using the command line. Type:
select sulfate, resn SO4
show sticks, sulfate
hide spheres, sulfate
- Use the command line to select the active site this time:
sele active, byres all within 5 of sulfate
show sticks, active
- Select any water molecules near the active site, using the command line, by typing each line of the following code:

Figure 3: Results from determining active site waters using the graphical interface
select active_water, ((active)around 3.3) and (resn HOH)
show spheres, active_water
alter active_water, vdw=0.5
rebuild
- Label the active site residues to identify any interacting residue. In the names/object panel, click: active → L → residues
- To keep the labels from going behind the biomolecule, in the command line type: set float_labels, on
The Measurement Wizard
- In the controls panel, click on the Wizards Menu (magic wand icon)
- In the pop-up window, click Measurements
-
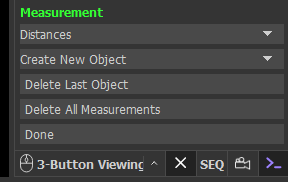
Figure 4: Shows the Measurement Wizard menu. Measurements contains several options (see Figure 4).
- Distances allow you to choose whether the measurement is between atoms (default) or centers of rings, as wells as making angles and dihedral measurements. Select the default.
- Create New Object brings up a dropdown called ‘New Measurements?’. Here you’ll be able to choose between ‘Merge with Previous’ (all measurements will appear as a single selection in the names/objects panel), ‘Replace Previous’ (this allows replacement of the last measurement with a new measurement), and ‘Create New Object’ (default option; each measurements appears individually in the names/objects panel). Select the ‘Merge with Previous’.
- If you make a mistake in your measurements (i.e., selected the wrong pair of atoms) you can click on the ‘Delete Last Object’ to fix it.
- If multiple issues arise, you can click on ‘Delete All Measurements’ to start fresh.
Measure the Distance Between Active Site Water and Active Site Residues
Note: It is strongly recommended that you save your session after every successful measurement. Users can experience a lot of frustration when a mistake occurs which requires you to ‘Delete Last Object’ which is essentially ‘Delete All Measurements’ for the ‘Merge with Previous’ option.
- Rotate and Zoom your structure so that it appears in a similar position to Figure 5.
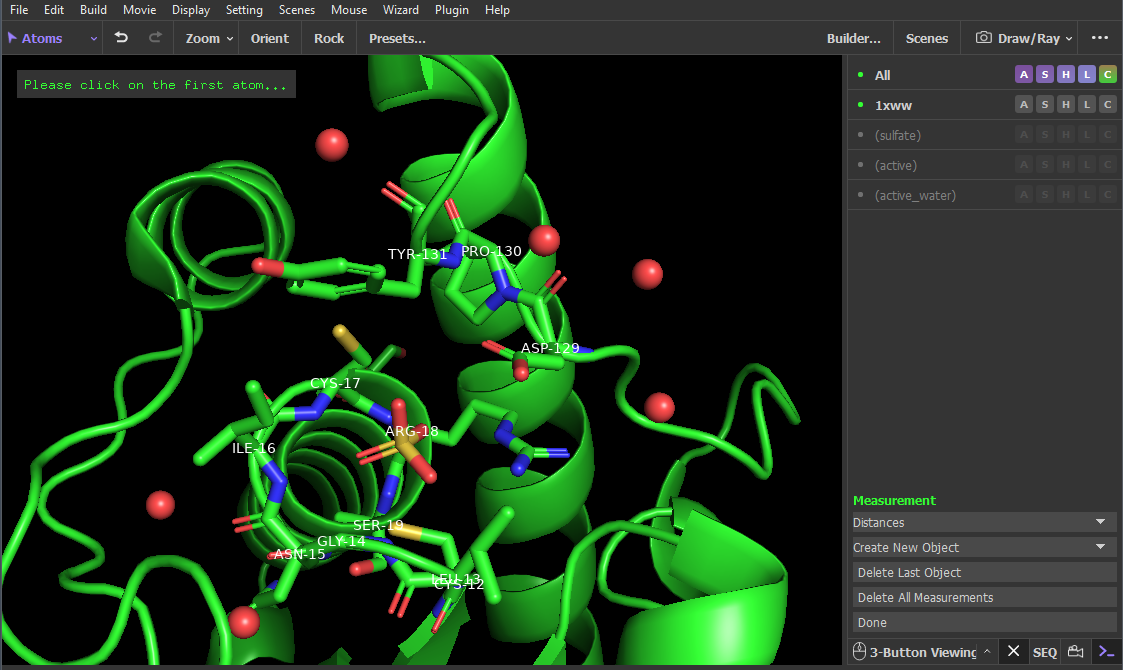
Figure 5. Starting point for using the Measurement Wizard. Note that the top-left corner of the structure viewer says ‘Please click on the first atom…’ - Click on the backbone carbonyl oxygen of TYR-131. This should do two things:
- a small red square will appear on the oxygen.
- The structure viewer should now say ‘Please click on the second atom…’.
- Click on the water molecule (represented as a red sphere) closest in 3D space to the carbonyl oxygen of TYR-131. This should do three things:
- A dashed yellow line (with a distance number) should appear between water and TYR-131
- A new object ‘measure01’ should appear in the names/object panel.
- The structure viewer should now say ‘Please click on the first atom…’.
- Repeat this process for every active site water molecule. Take great care not to accidentally click on an atom when you rotate or translate the biomolecule (see note above about saving frequently).
- Once you make all the measurements, click on ‘Done’ in the Measurements Wizard Menu to exit the wizard.
- Change the color of the lines to cyan. In the names/object panel, beside measure01 click: C → cyans → cyan
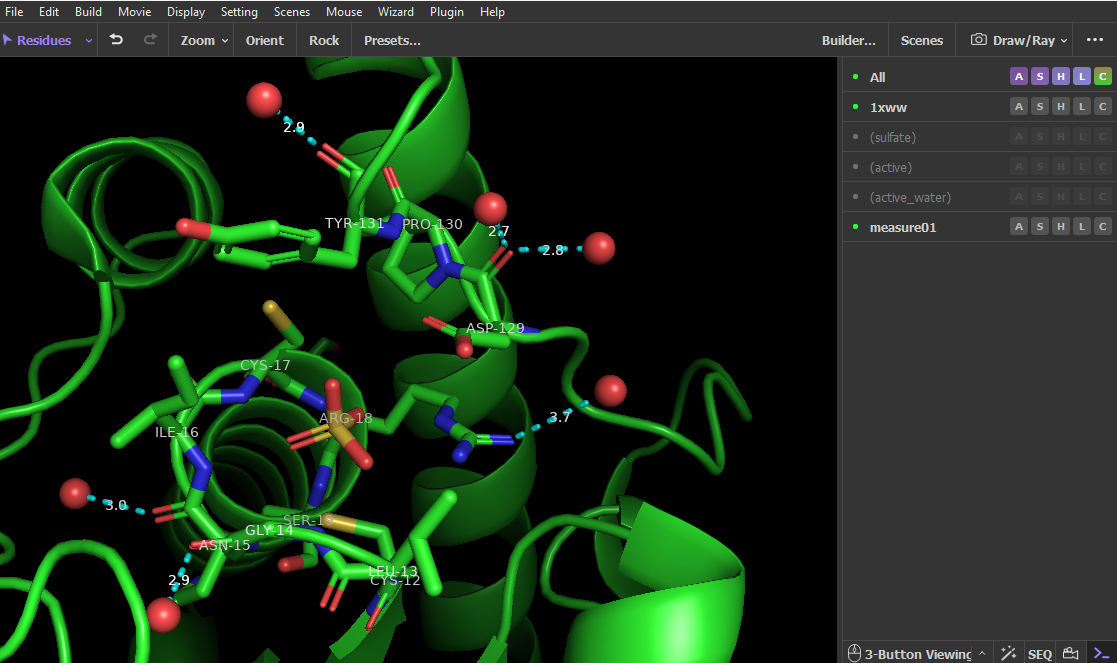
- See Figure 6 for the finished product.
Video Tutorial
Click here to go to Chapter IX: Manual Measurements