
VI.C. Mol* Selecting on the Sequence and Labeling
Didem Vardar-Ulu and Shane Austin
Overview: This activity demonstrates how to select parts of a macromolecular structure using the sequence display.
Outcome: The user will be able to select parts of a macromolecule using the sequence, and purposefully modify their display.
Time to complete: 15 minutes
Modeling Skills
- Using the sequence to create selections
- Labeling parts of the molecule
About the Model
PDB ID: 1xww
Protein: Low molecular weight protein tyrosine phosphatase
Activity: hydrolyzes Tyr-OPO32- phosphoester bond
Description: single chain, bound SO42- competitive inhibitor, bound glycerol (nonspecific stabilizer)
Steps
Load the Structure:
- Go to rcsb.org
- In the search bar at the top, type: 1xww and press Enter.
- On the landing page, click the “Structure” tab next to the highlighted “Structure Summary” tab to open the user interface and load the structure.
- Hide the “Ligand”, “Water”, and “Ion” components listed in the “Structure Panel” by clicking on the “eye” icon next to them.
Select part of the molecule by sequence: (Figure 1)
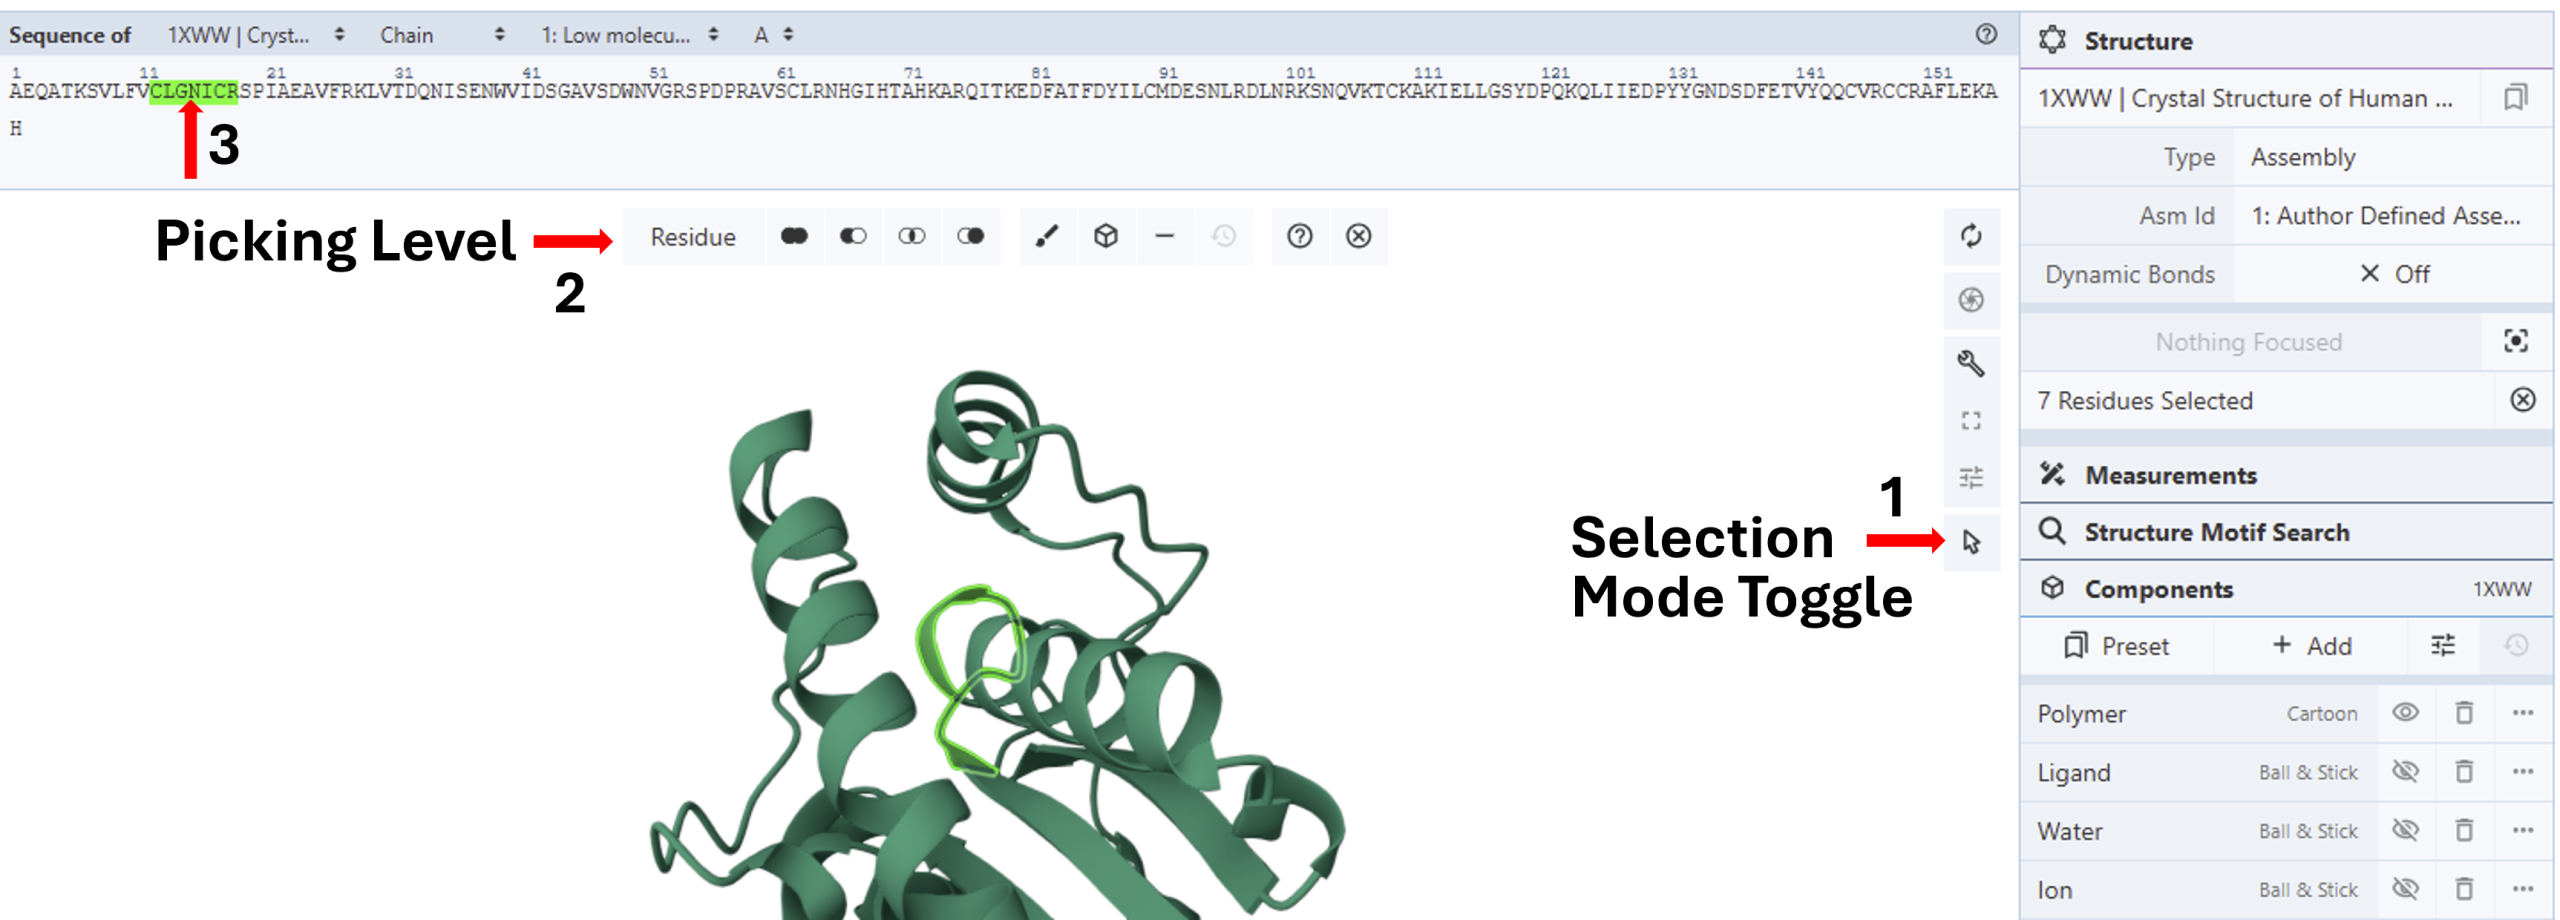
- Activate the “Select Mode Toggle” by clicking the “cursor” icon (Arrow 1).
- Choose your picking level as “Residue” (Arrow 2).
- Click on the first residue you want to select in the Sequence panel (e.g., C12) and drag to the last residue you want to select (e.g., R18, Arrow 3). This will highlight the selected region in green on the sequence and the 3D canvas.
Note: Hovering your cursor on any part of the sequence or structure will display information about the PDB ID, model number, instance, chain ID, residue number, and chain name listed at your chosen picking level at the bottom right corner of the 3D canvas.
- Create a new component (e.g., P-loop) as described in Chapter V.C “Create a new component from selected elements”. During component creation, choose “Ball and Stick” for the “Representation” to show this selection’s sidechains and label your component “P-loop”.
Show Label on the Structure: (Figure 2)
You can label a component as a whole or select individual parts (e.g., residue) to apply separate labels.
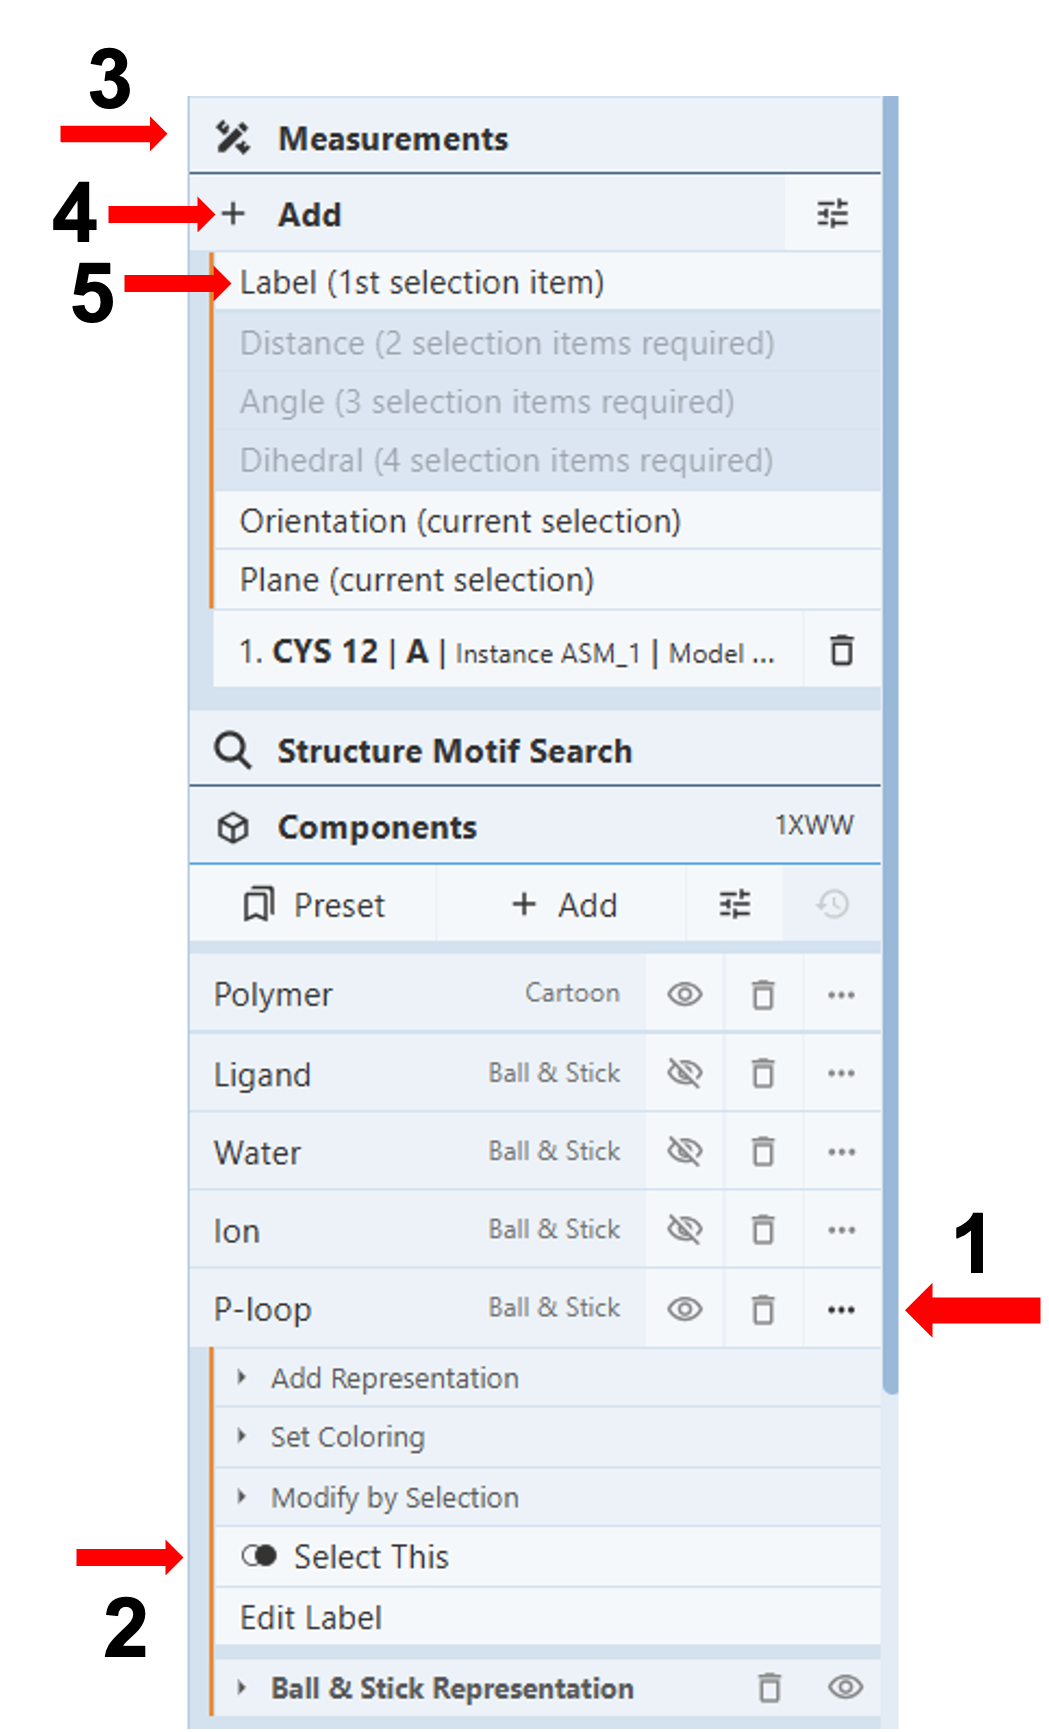
- Label the P-loop:
-
-
-
- Click on the three dots next to the component “P-loop” (Arrow 1)
- Click “select this” (Arrow 2)
- Click “Measurements” (Arrow 3) to open up a drop-down menu.
- Click “Add” (Arrow 4) and click “Label” (Arrow 5). Use the instructions in the next section “Customize Labels”, to modify the label.
-
-
- Label residues in the P-loop:
-
-
- Click on the residue you want to label on the sequence or 3D canvas.
- Click “Measurements” (Arrow 3) to open up a drop-down menu.
- Click “Add” (Arrow 4) and click “Label” (Arrow 5). Use the instructions in the next section “Customize Labels”, to modify the label.
-
-
Note: Labels are created near the center of the component or selection in the default format, which you can further modify.
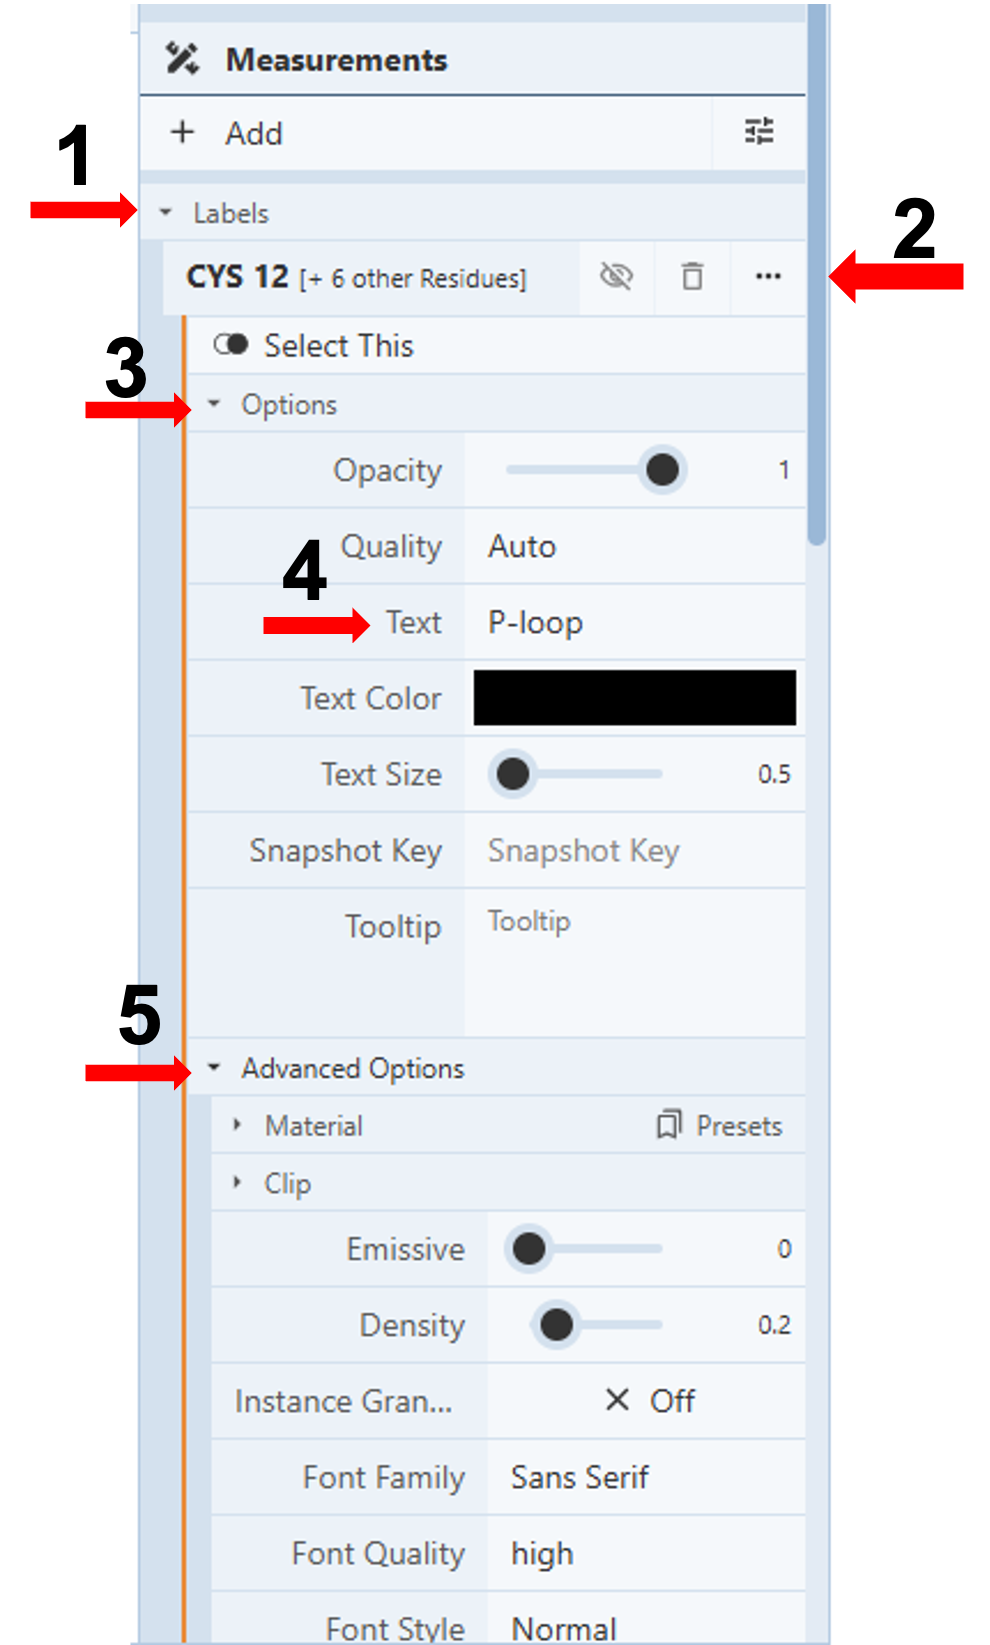
Customize Labels: (Figure 3)
-
-
- Click “Labels” to see a list of all the created labels (Arrow 1)
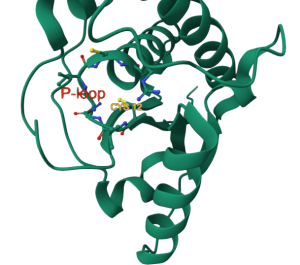
Figure 4: Labelled P-loop on 1xww - Click the three dots next to the label you want to modify. (Arrow 2)
- Click “Options” to activate a drop-down menu. (Arrow 3)
- Enter the name for your label in the cell next to “Text” (Arrow 4)
- Click “Labels” to see a list of all the created labels (Arrow 1)
-

Note: In this same drop-down, you can change the text size, color, opacity, and quality of the label. When you click “Advanced Options” (Figure 3, Arrow 5), you can gain access to numerous additional controls, including location (offset x, offset y, offset z).
Jump to the next Mol* tutorial: VII.C. Mol* 5A Selection