
V.C. Mol* Mouse/Trackpad Selection
Didem Vardar-Ulu and Shane Austin
Overview: This activity demonstrates how to select and label parts of a macromolecular structure
Outcome: The user will be able to identify parts of a macromolecule of interest, select them with the mouse/trackpad, and save them as separate objects.
Time to complete: 15-20 minutes
Modeling Skills
- Selecting groups in the structure viewer window with the mouse
- Saving selected groups (i.e., “components”)
- Rendering selections separately
About the Model
PDB ID: 6m0j
Protein: SARS-CoV-2 spike receptor-binding domain bound to the ACE2 receptor
Activity: Angiotensin-converting enzyme 2 (Chain A); Spike protein S1 (Chain E); NAG – glycan; Zn2+; Cl–
Description: Receptor for SARS-CoV-2 pandemic virus
Steps
Load the Structure:
- Go to rcsb.org
- In the search bar at the top, type 6m0j and press Enter.
- On the landing page, click the “Structure” tab next to the highlighted “Structure Summary” tab to open the user interface and load the structure.
Note: As the default, chain A is ACE-2 shown as green, and chain E is the Spike protein S1 shown as an orange ribbon (cartoon) with a white background on the 3D canvas. The sequence panel shows the Chain A sequence.
Select and color the chains. (Figure 1)
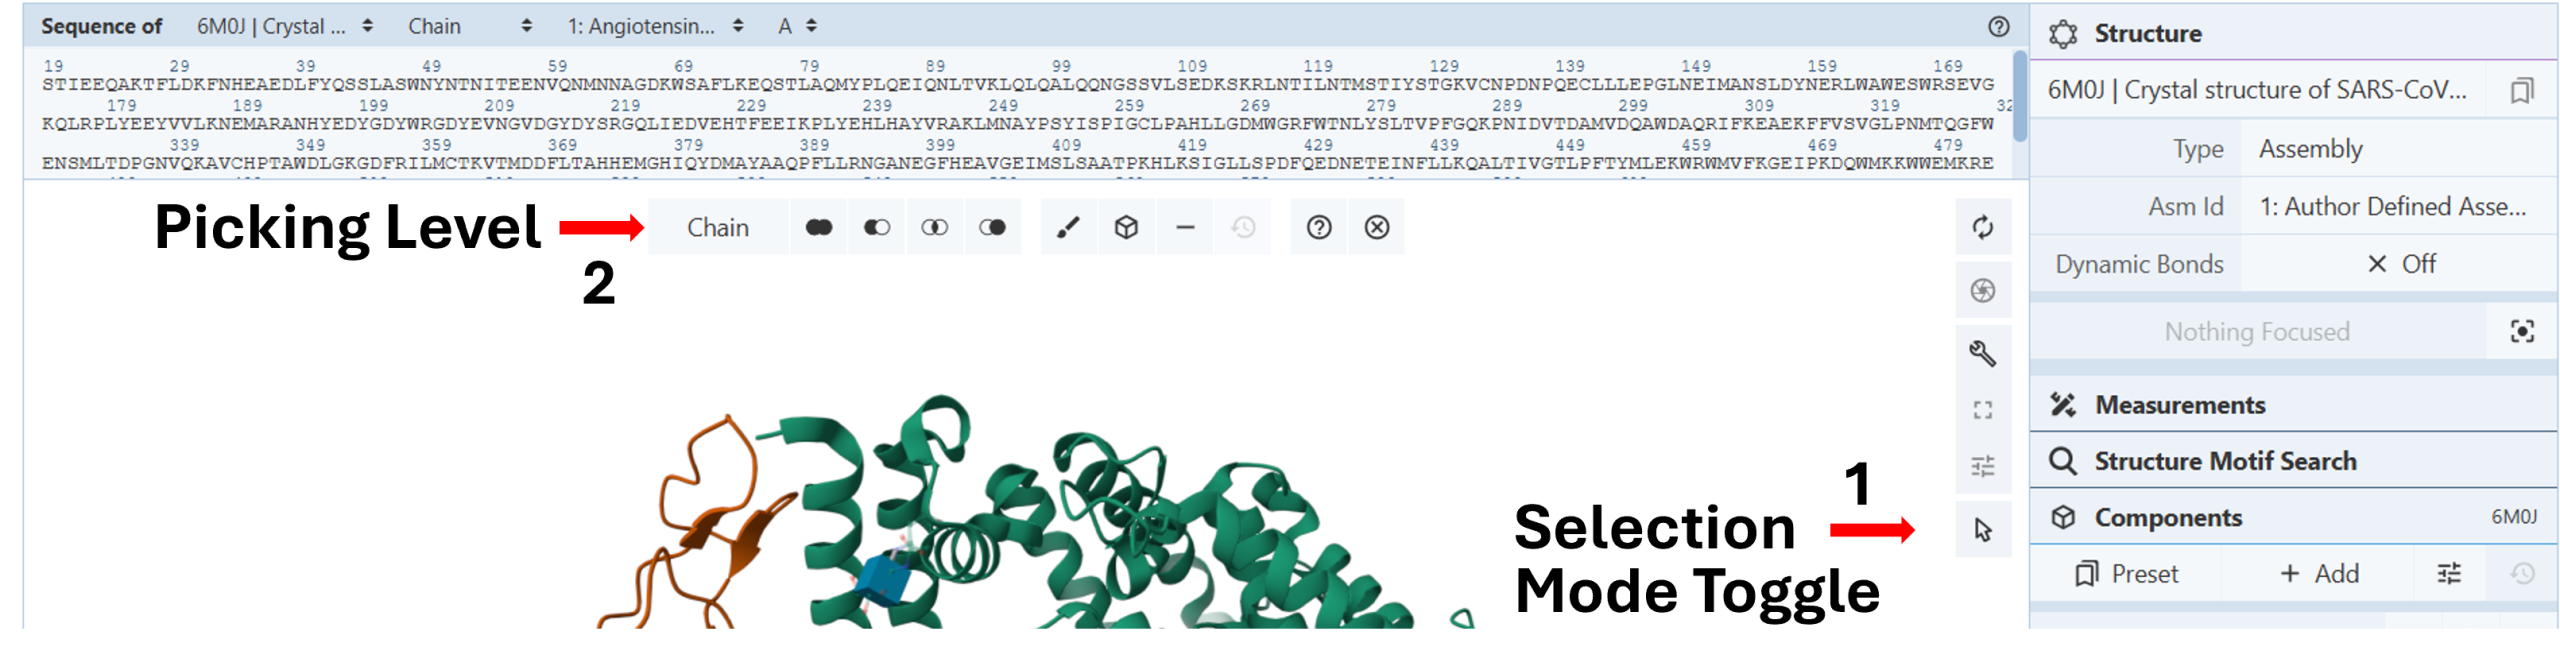
- Activate the “Select Mode Toggle” by clicking the “cursor” icon (Arrow 1).
- Choose your picking level as “Chain” (Arrow 2).
- Click the chain you want to color differently on the 3D canvas.
- Color the chain using the “Changing colors” protocol in Chapter II.C.
Create a new component from selected elements: (Figure 2)
Note: You can turn a set of selections into a new component that can be manipulated independently from the components panel. It may be especially helpful if you have selected several residues in a protein (Chapter II.C: “Select components”) that you want to return to multiple times to perform different actions.
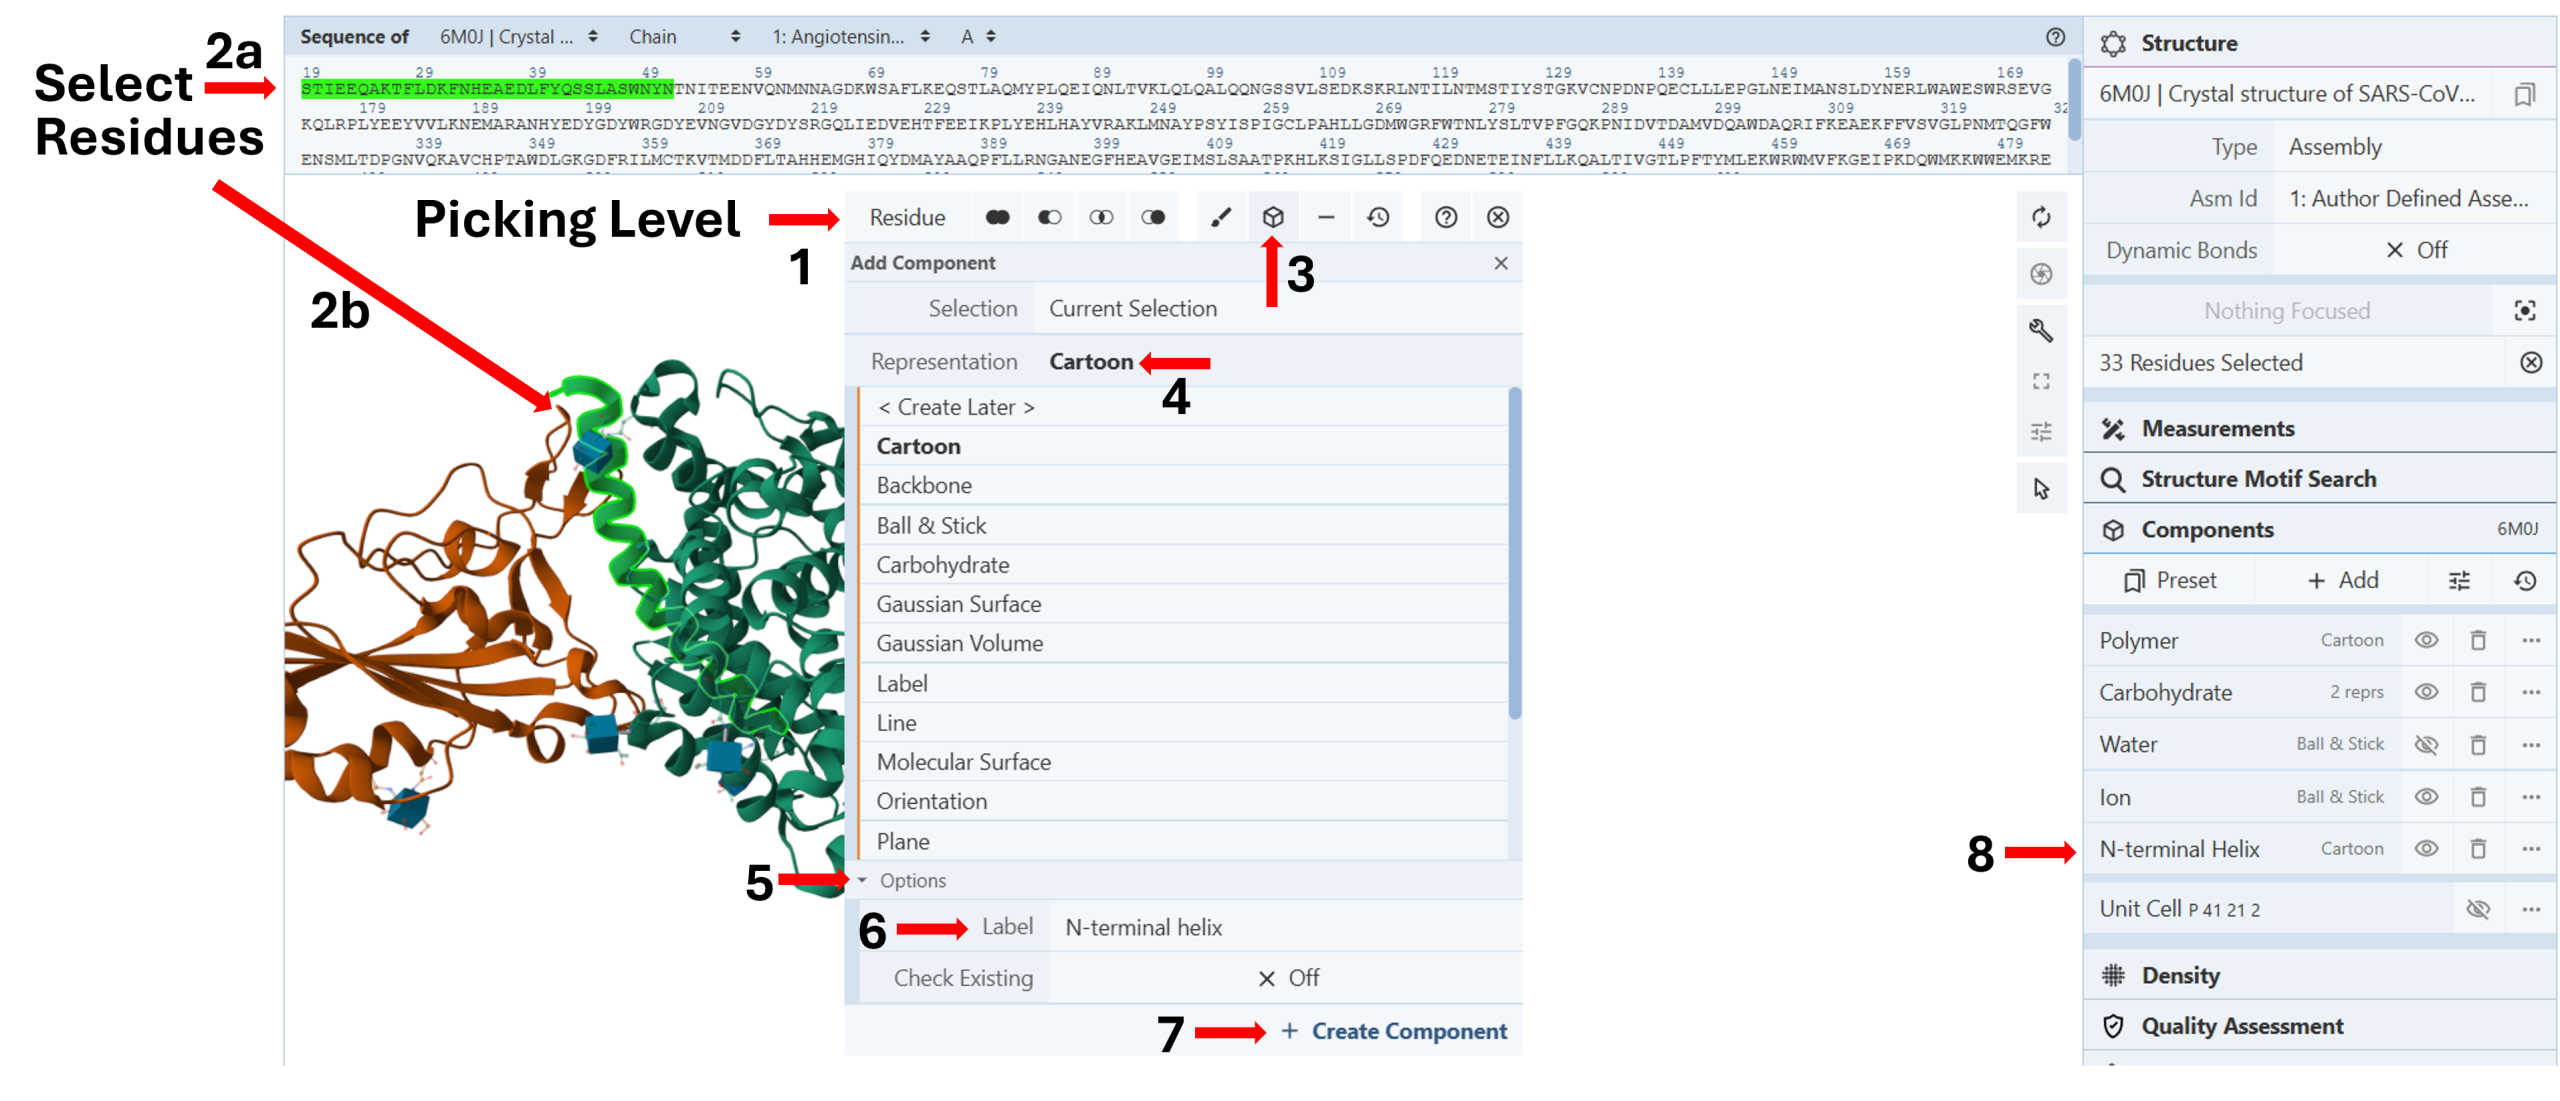
- Change your “Picking Level” to “Residue” (Arrow 1).
- Select the desired residues either by clicking them on the sequence panel (Arrow 2a) or the 3D Canvas (Arrow 2b)
- Click the “Components Icon” (Arrow 3) to activate a dropdown menu.
- Click the cell next to “Representation” (default “Create Later”) and choose your desired representation. (E.g., Cartoon) (Arrow 4)
- Click “Options” to activate it. (Arrow 5)
- Enter the desired label. (E.g., N-terminal helix) (Arrow 6)
- Click “Create Component” (Arrow 7)
Under the “Components” list in the “Structure Panel”, you will now see a new component you can independently modify (color, render, etc.). (Arrow 8)
Change Renderings of Glycans and Ions:
Note: Glycans are listed as a separate component (Carbohydrate) under “Components” in the Structure panel. By default, both the semitransparent ball and stick and the carbohydrate (blue cubes) representations are shown on the 3D canvas.
Zn2+ and Ca2+ ions are listed as a single component (Ion) under “Components” in the Structure panel. Zn2+ is shown as a gray sphere and Ca2+ as a green sphere.
- Modify the rendering of these components, by following the steps in Chapter II.C, “Create Alternative Renderings”.
Changing Background Color: (Figure 3)

- Deactivate the “Select Mode Toggle” by clicking the “cursor” icon (Arrow 1).
- Click on the Settings/Controls Information button in the Toggle Menu (Arrow 2).
- Click on the cell next to the Background option to access the color palette (Arrow 3).
- Select the desired color using the preset colors or create a new one using the RGB tool or the Lighten/Darken buttons.
Note: If you click the three dots next to “Background”, a new option opens up where you can toggle “Transparent” On/Off to make the background transparent.
Jump to the next Mol* tutorial: VI.C. Mol* Sequence Labeling