
V.B. iCn3D Mouse/Trackpad Selection
Henry V. Jakubowski and Kristen Procko
Overview: This activity demonstrates how to select and label parts of a macromolecular structure
Outcome: The user will be able to identify parts of a macromolecule of interest, select them with the mouse/trackpad, and save them as separate objects.
Time to complete: 15 minutes
Modeling Skills
- Selecting groups in the structure viewer window with the mouse
- Saving selected groups
- Rendering selections separately
About the Model
PDB ID: 6m0j
Protein: SARS-CoV-2 spike receptor-binding domain bound to the ACE2 receptor
Activity: Angiotensin-converting enzyme 2 (Chain A); Spike protein S1 (Chain E); NAG – glycan; Zn2+; Cl–
Description: Receptor for SARS-CoV-2 pandemic virus
Steps
Load Structure
- Open iCn3D – https://www.ncbi.nlm.nih.gov/Structure/icn3d/full.html
- In List of PDB, MMDB, or AlphaFold UniProt structures, type 6M0J
- Click “load biological unit”.
Note: Default render is ribbon (cartoon) with black background. Note the S-S bonds (yellow sticks) and Glycan (CPK colored sticks).
- To view glycans, we will first ensure iCn3D is in the full menu mode. In the upper left-hand corner, click the down arrow and select “all” to display all menu items.

- In the dropdown menu: Style → Glycans → Show Cartoon to display an overlay of the SymbolicNomenclature for Glycans (SNFG)
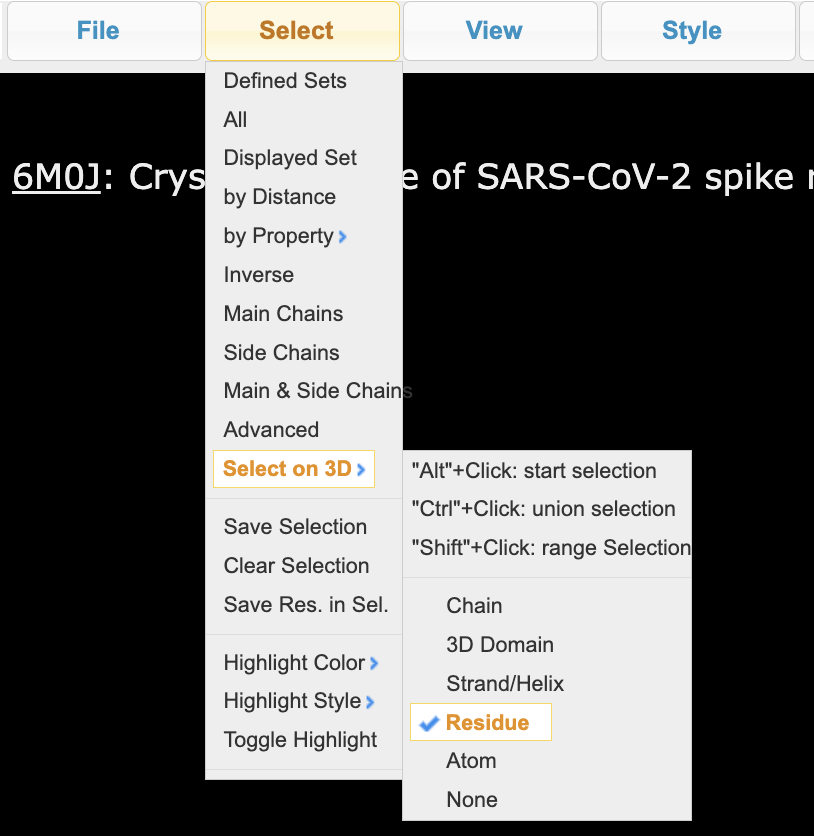
Selecting Residues or Ions with the Mouse
- In the dropdown menus: Select → Select on 3D → Residue (ensure residue is selected by clicking on it)
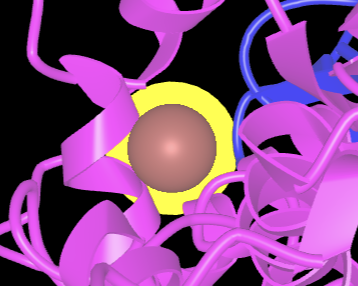
- Rotate and zoom the structure so that the dark sphere is visible and unobscured. It is best if there are no parts of the protein behind it. With the mouse or trackpad, hover over Zn
- Alt+Click (Option+click on Mac) and a yellow halo will appear around it (ions are considered residues for selection)
- Save the Zn ion selection:
a) Using the dropdown menu: Select → Save Selection
b) In the popup window that comes up, name it Zn
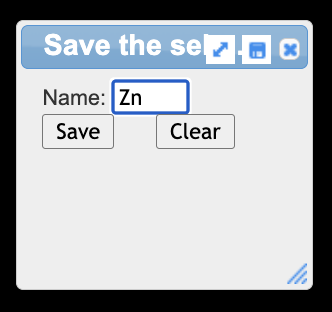
c) Click “save”
- Select and save a selection for the Cl ion
a) Alt+Click (Option+click on Mac) on the Cl ion
b) Use the dropdown menu to save: Select → Save Selection
c) In the popup window that comes up, name it Cl
d) Click “save”
Note: To save both ions as one selection, you can select multiple objects. First, Alt-click Zn and then Ctrl+click Cl to add it to the current selection.
Selecting Chains with the Mouse
- Using the dropdown menus, change the selection mode to select chains: Select → Select on 3D → Chain (click on the word chain)
- Alt+Click blue chain (Sars-Cov2-Spike S1 Receptor BD)
- Save the selection
a) Using the dropdown menu: Select → Save Selection
b) In the popup window that comes up, type SpikeRBD
- Alt+Click pink chain (ACE-2)
- Save the selection
a) Using the dropdown menu: Select → Save Selection
b) In the popup window that comes up, type ACE2
Note: You may need to click the blue chain again to deselect it after clicking on ACE2. It appears that chain selection behaviors may not be the same as residues.
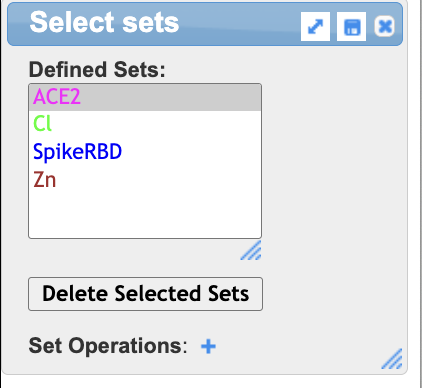
Rendering
- In Selected Sets popup that appears to the right, click ACE2 if it is not already selected
- Using the dropdown menus: Color → Unicolor → Gray → Light Gray
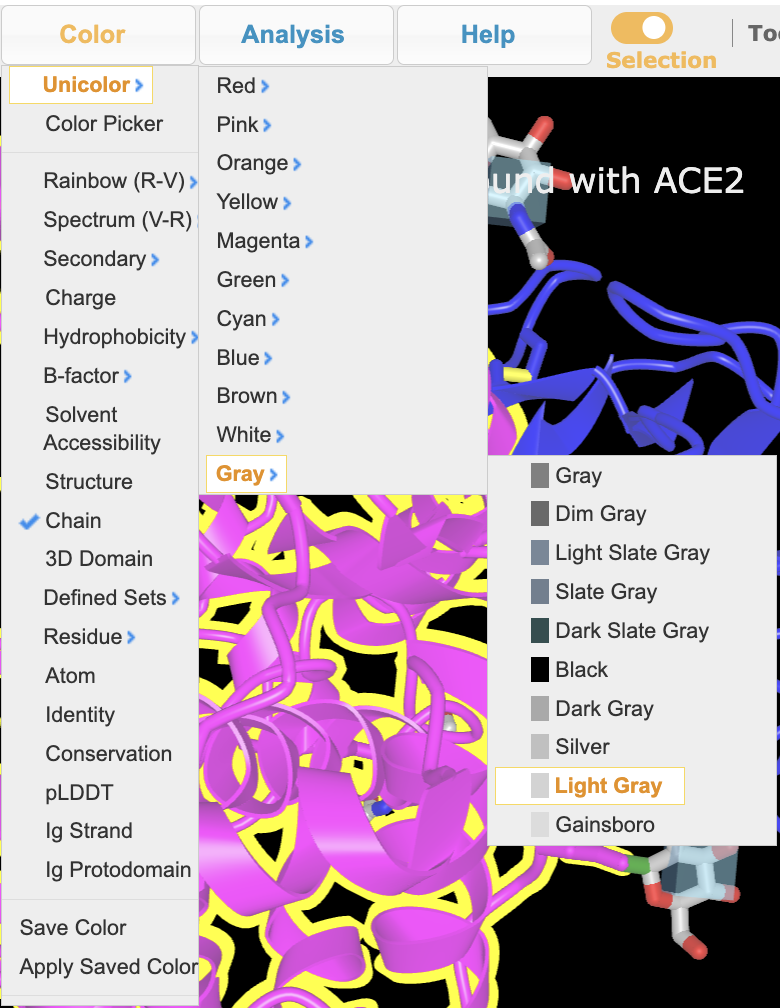
- In Selected Sets popup that appears to the right, click Spike-RBD
- Using the dropdown menus: Color → Secondary → Sheets in Yellow
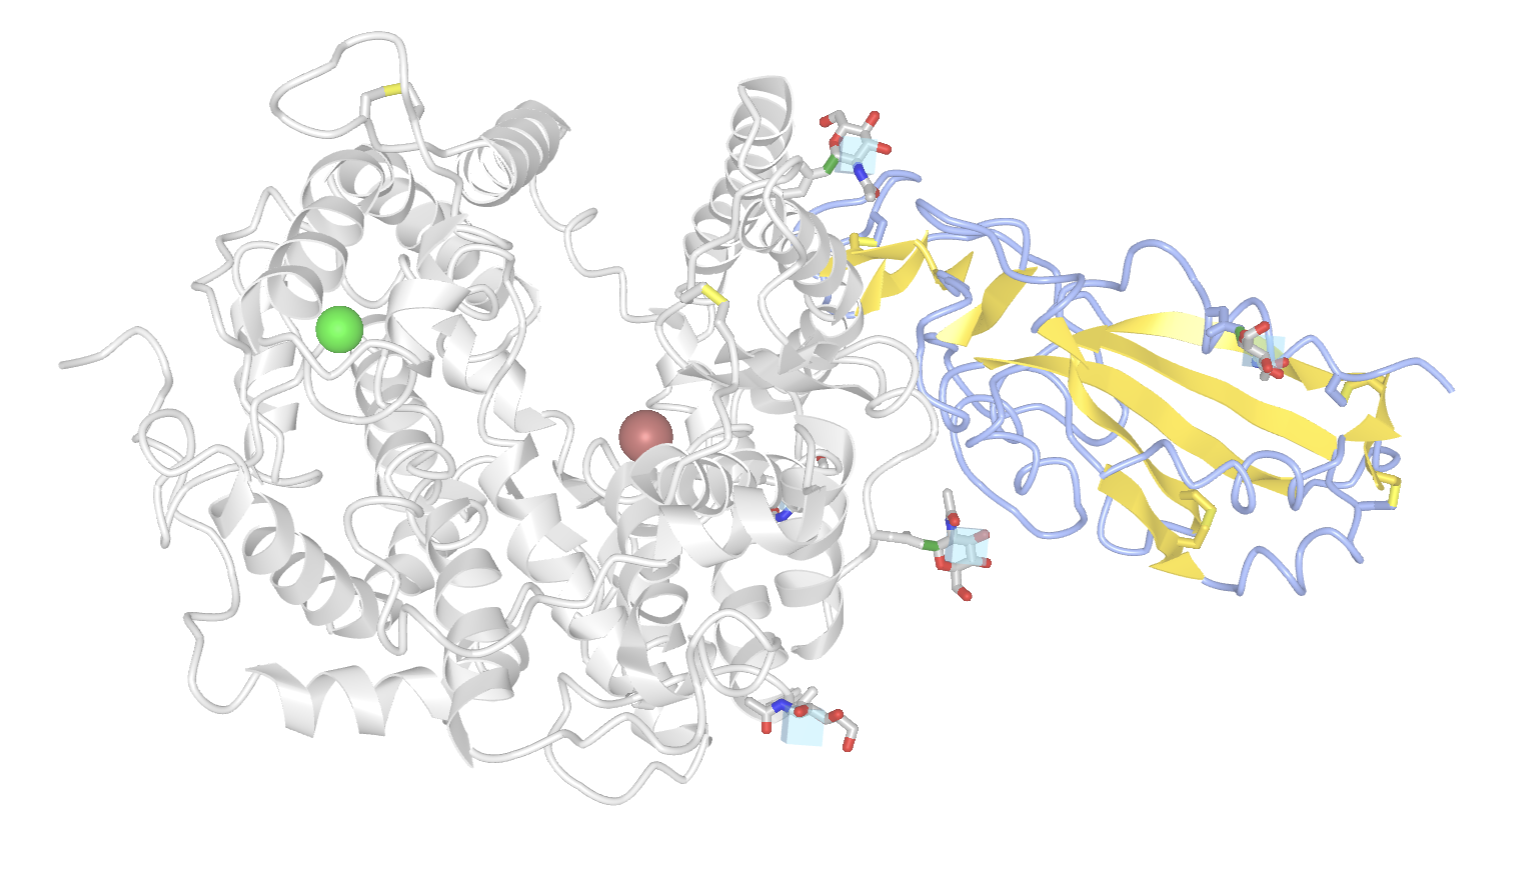
- Change the background to white using the dropdown menu: Style → Background → White
- To clear the yellow highlight, there are two options:
a) In the dropdown menu: Select → Clear Selection
b) In the dropdown menu: Select → Toggle Highlight
- (Optional) Save the file using the dropdown menu: File → Share Link → Save short URL
See example
Jump to the next iCn3D tutorial: VI.B. iCn3D Selection Tools